Episode 3. Infoline

Author: Łukasz Strumiński
Created: 2017-10-19. Updated: 2022-11-29.
In this section you will get acquainted with our infoline. The infoline allows you to handle incoming calls. The key to a successful phone line is proper configuration.
Table of contents
Introduction
In this section you will get acquainted with the inbound module. Infoline allows you to handle incoming calls.
Simplified call handling process
- The customer calls the company phone number connected to Thulium.
- The call goes to the IVR, where he can make a selection of the case he is calling about.
- Then, after the selection is made, the call is routed to the appropriate queue.
- In the queue, the system queues people waiting to be connected to a consultant. The queue can be handled by multiple consultants with different priority.
- If all agents are busy then the customer hears a message along with the information about the occupied place in the queue, which helps to keep the customer's attention on the infoline.
- While waiting in the queue, the customer can get a message that after, for example, abandoning the call, he will get a return call (callback).
- If there is more than one free, the system will behave according to the selected call distribution policy. For example, it will direct the call to the longest free consultant.
Step by step
At this stage we want to introduce you to the logic of operation. We will help you in preparing the configuration once you get to know our system a little better.
IVR (for Interactive Voice Response) is a voice menu feature that allows a customer to tone in the subject of an issue or the department they want to call to automatically switch the customer to the appropriate location.
Did you know...💡
Our IVR can also perform more advanced actions, such as directing calls to different queues or consultants depending on certain criteria or information contained in the customer's card. The system can also take into account: working hours, the number of available consultants, the assigned attendant, and even identify the client by any numeric value stored in the client's card.
1. At the start, you have a pre-configured simple IVR tree (as well as associated queues). You can see them by selecting from the Administration tab under Telecommunication → IVR tree.
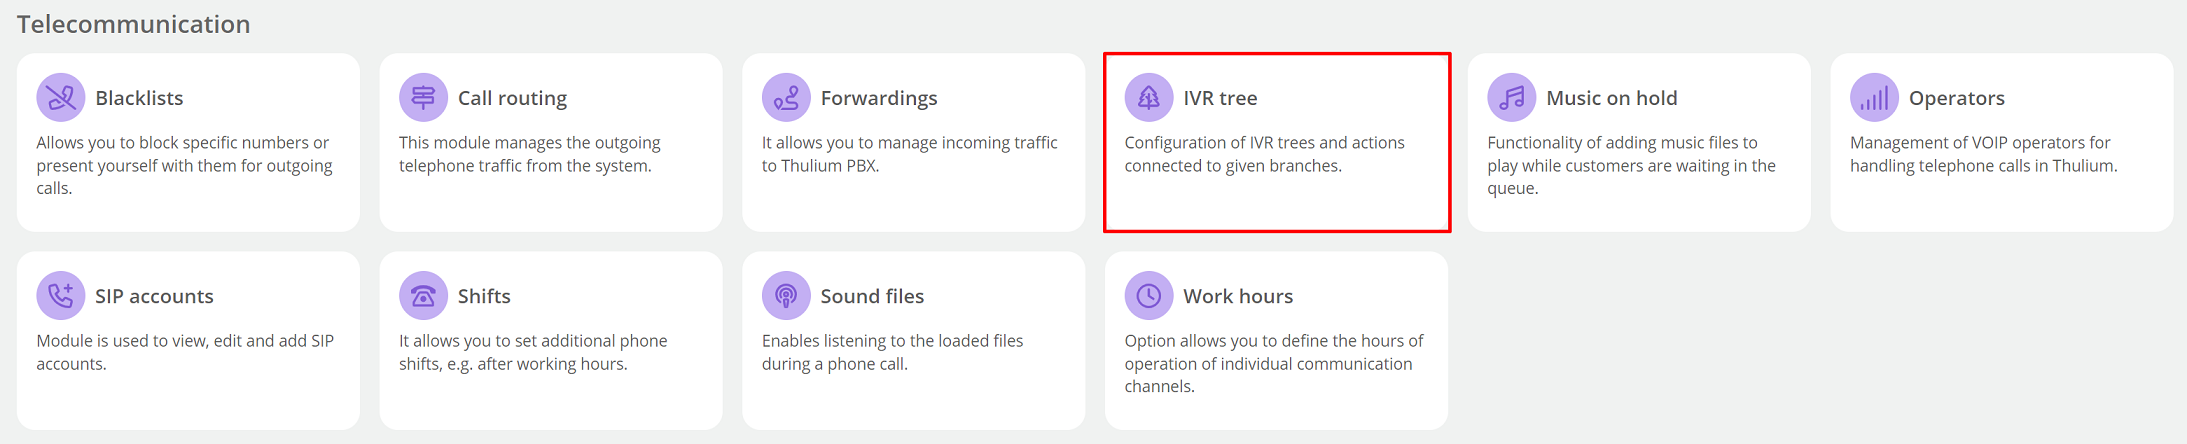
2. Your tree follows one of the most popular patterns among our customers:
- The IVR checks in the 1 branch whether the call comes into the company during business hours or out-of-hours. The business hours Standard scheme is used here, which assumes weekday operation from 08:00 - 20:00.
- During working hours, the call goes to the 2 branch, where messages from the 2-c1, 2-c2 and 2-c3 branches are played in sequence. The first message is a Greeting. The second contains information about the possibility to tone dial a phone key with the digit 1 to connect to a consultant. The third is our invitation to contact us in case of problems with the IVR tree.
- The next branch contains the action Switch to queue, which causes the selection of 1 to direct the call to the Infolinia queue. In order for everything to work as expected, the queue must have agents assigned.
- If a call goes to the helpline outside business hours or on special days, it is switched to the 3 branch, where the call is disconnected thanks to the Disconnect action.

3. Keep in mind that this is only a preliminary IVR Tree to help you get to know our system. You can customize its shape, messages and hours of operation to suit your needs.
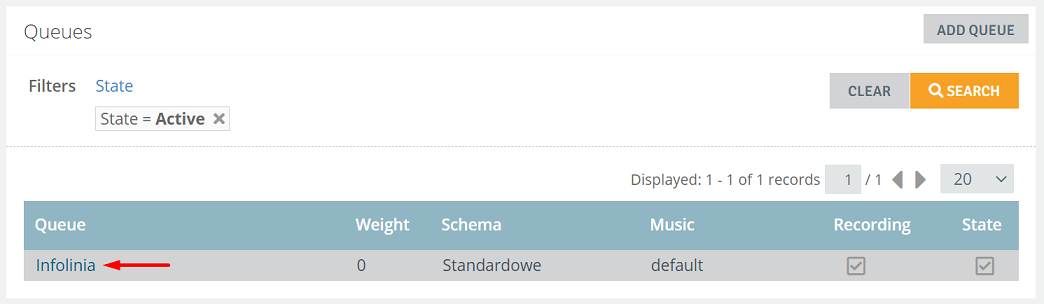
We have created one queue for you to assign agents to.
1. From the Administration tab in the Inbound section, select Queues.

2. Then enter the Infolinia queue.
3. In the Assigned agents section, click  , select agents by checking the appropriate checkboxes.
- Note that next to each assigned agent there is an option to enter priority.
- Using this parameter, you can manage the order of service by creating, for example, the first and second lines of support.
- The people who handle all the cases in this queue should have priority 0.
- People to whom you want to direct calls in the second order (when those in the first line are busy) can have a higher value of this parameter.
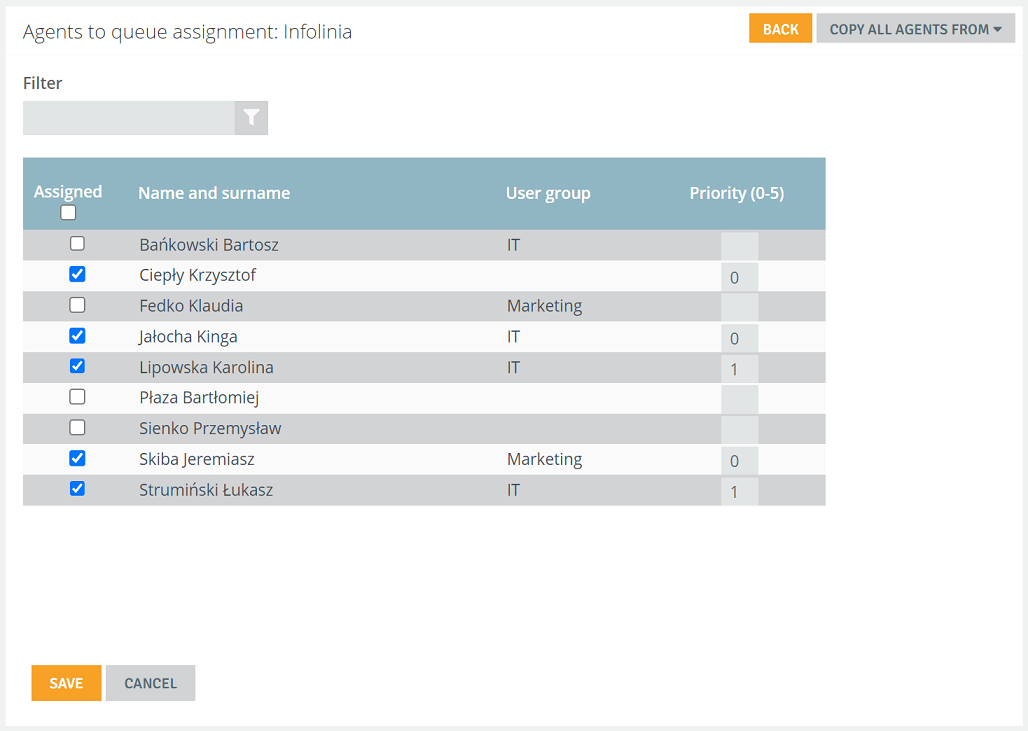
- Confirm your changes with
 .
.
You already have your IVR and queue with assigned agents ready. It's time for you to call your Hotline.
1. After logging in, run Web Softphone and change the status to Free to receive calls.
2. On the Administration tab, from the Telecommunication section, select Forwardings.
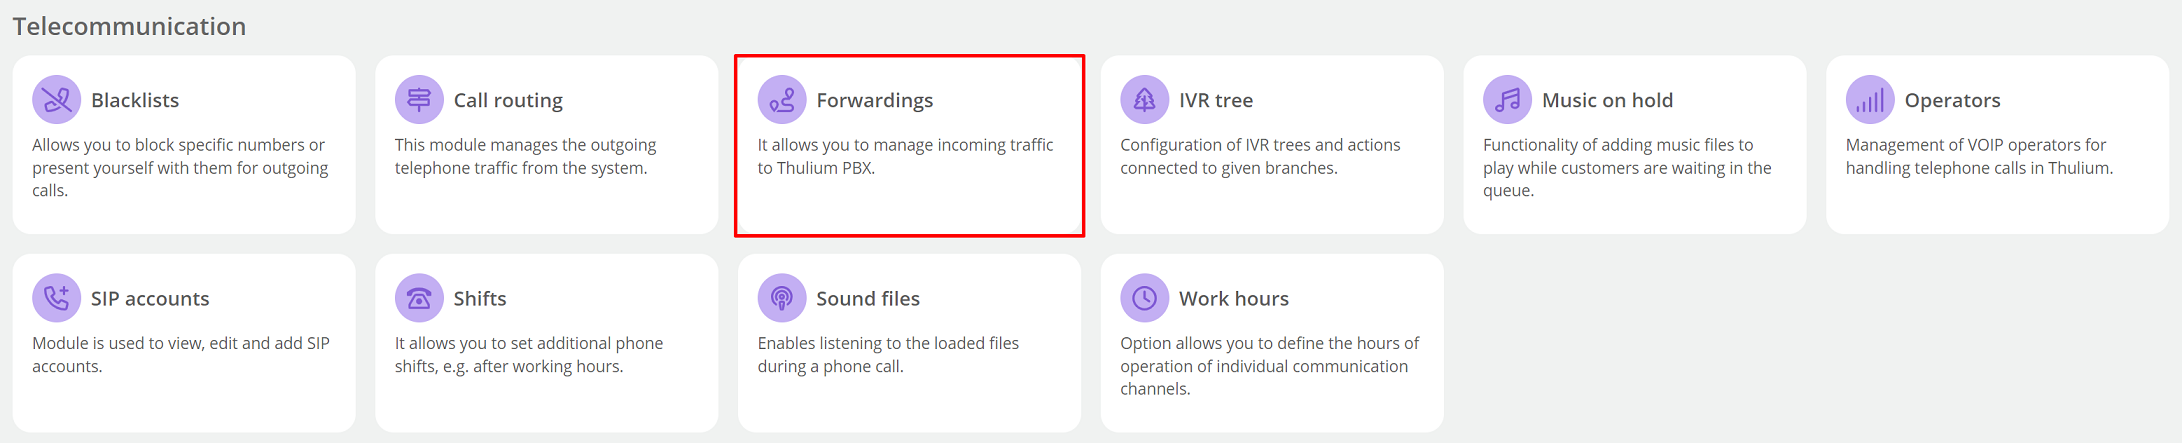
3. Check your phone number and call it. Notice that the calls are routed to the IVR, whose operation you learned earlier.
Did you know...💡
At the onboarding stage in the Thulium system, our Customer Service Department, may grant you a test phone number.

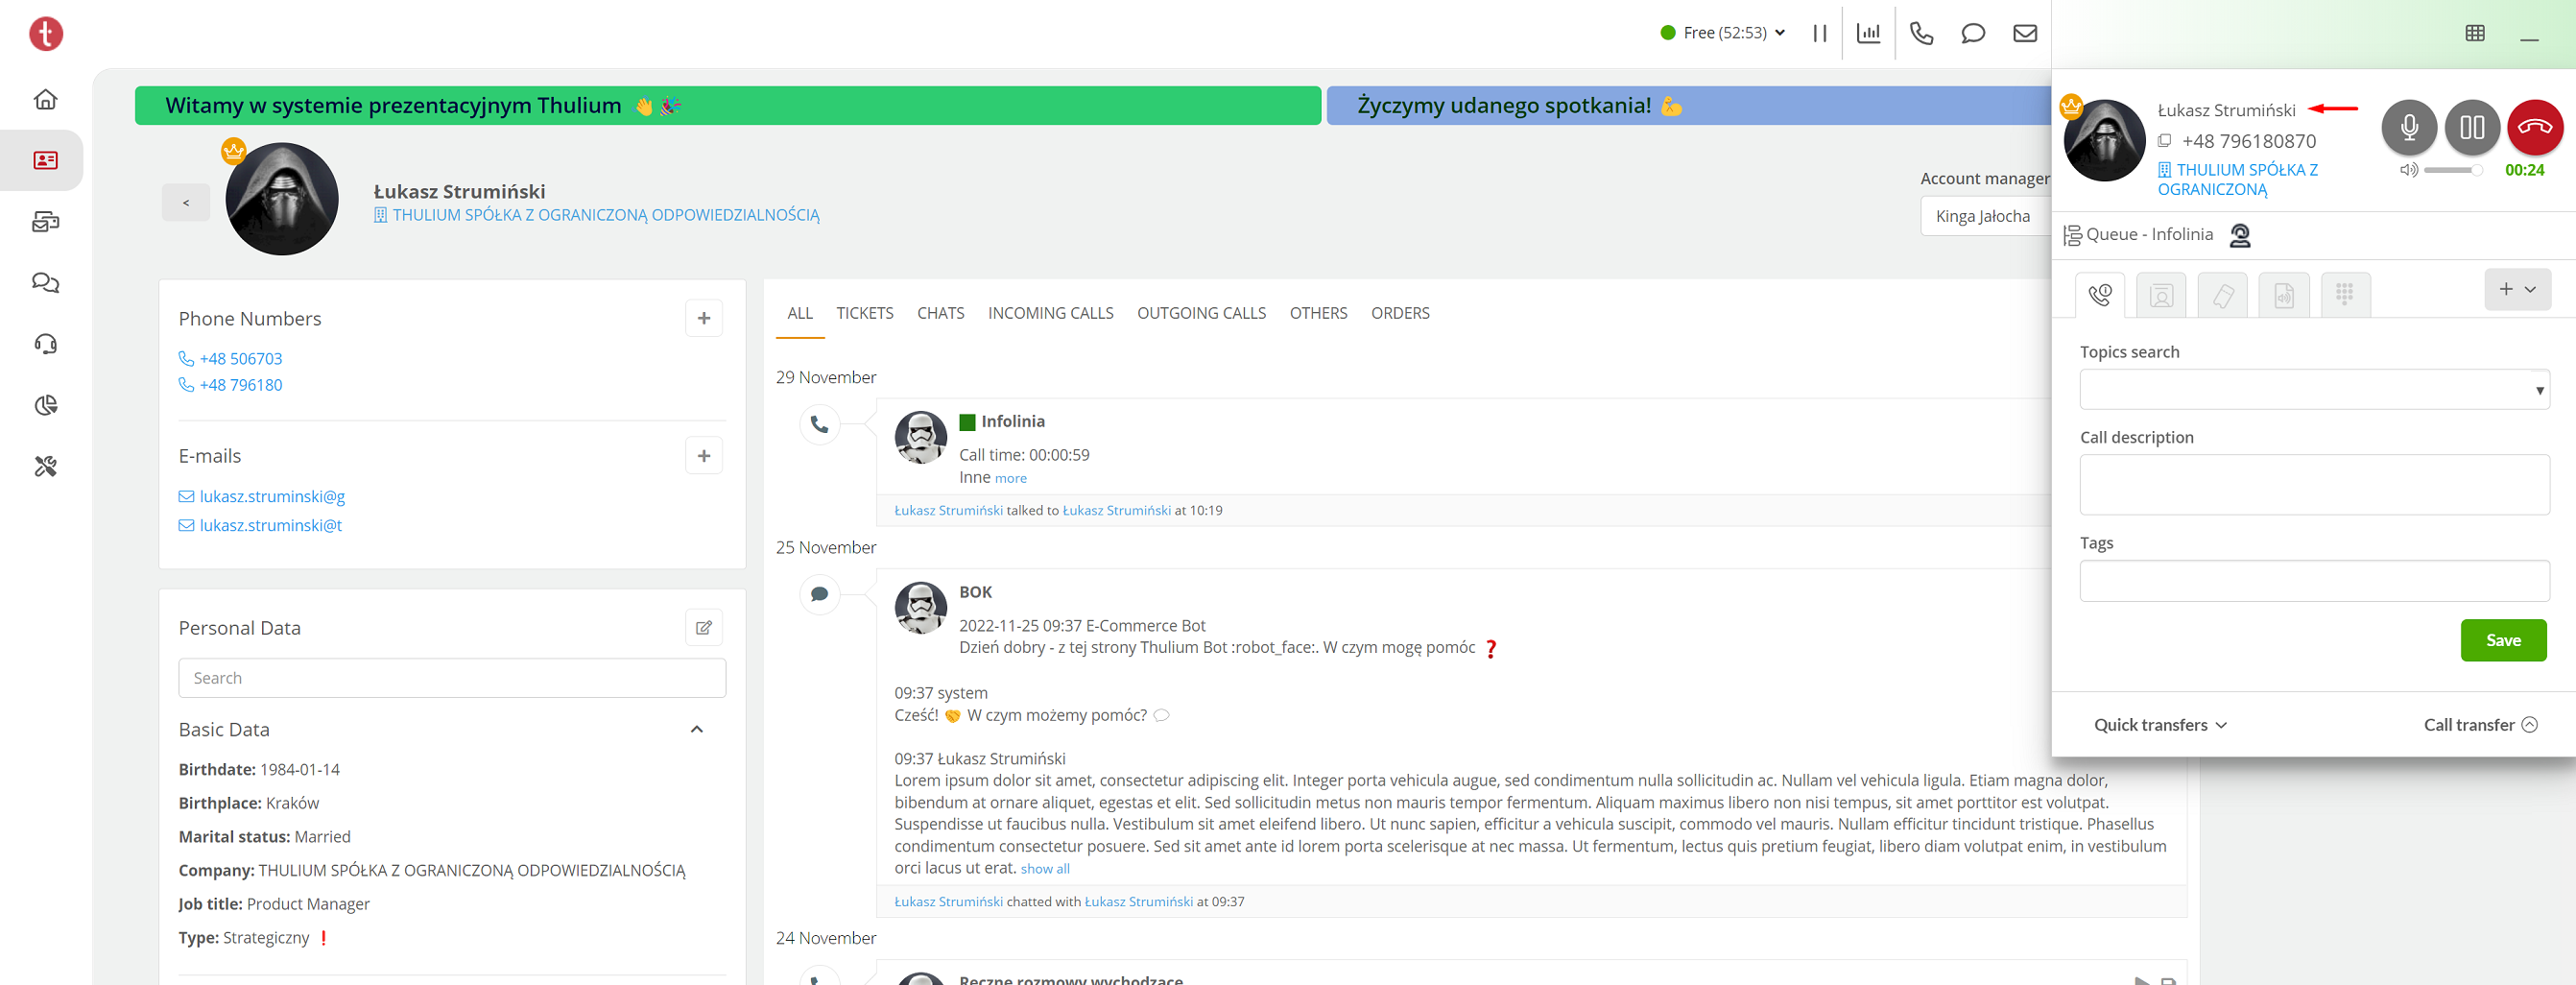
4. If you call from the number you provided at registration, the system should identify it - when the call is offered, a Web Softphone window will appear in the upper right corner identifying the customer (remember to set Free status in the system).

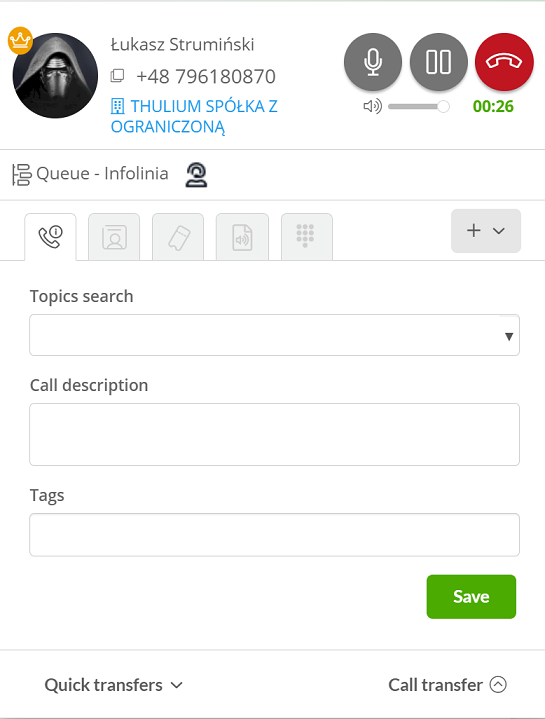
5. Now just click on the link there and after a while you will be taken to Customer card.
6. Within the hotline, you can use the callback function.
- The function calls back customers whose call has not been answered (abandoned or abandoned with selection).
- It can call back those who have expressed a wish to do so, or all those who called and chose not to wait.
- Callbacks will allow you to ensure that truly all customers are served.
- By taking the burden of contacting the customer off your shoulders and taking it upon yourself, you build the image of a customer-friendly company.
Next Episode 4. Email

Share your opinion with us