Episode 2. Customers
Table of contents
Introduction
The Customers tab allows you to gather information about your customers in one place. Every contact with a customer will be recorded here, giving you the opportunity to view the full history - view messages and listen to conversations. If you want to test the functions of our system, add several customers - individuals or companies.

Step by step
In this section we will show you how to add customers to your CRM.
Did you know...💡
To make it easier for you to test, the system will automatically add you as a customer with the phone number you provided at registration.
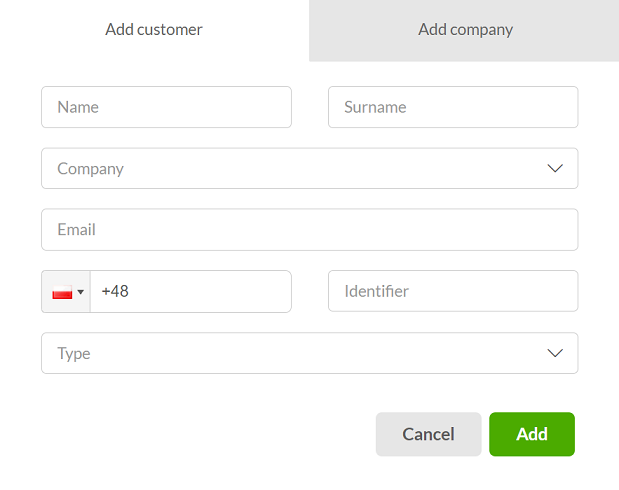
1. We'll show you how to do this with an example of adding another person. Go to the Customers tab, expand the  button and select Add customer.

2. Fill in the details of the customer - a name or phone number is required. You can complete the rest of the data in the next step according to your preferences and needs.

3. After completing, click  .
.
Hint...🎯
If you want, you can add a list of customers using a ready-made CSV file.
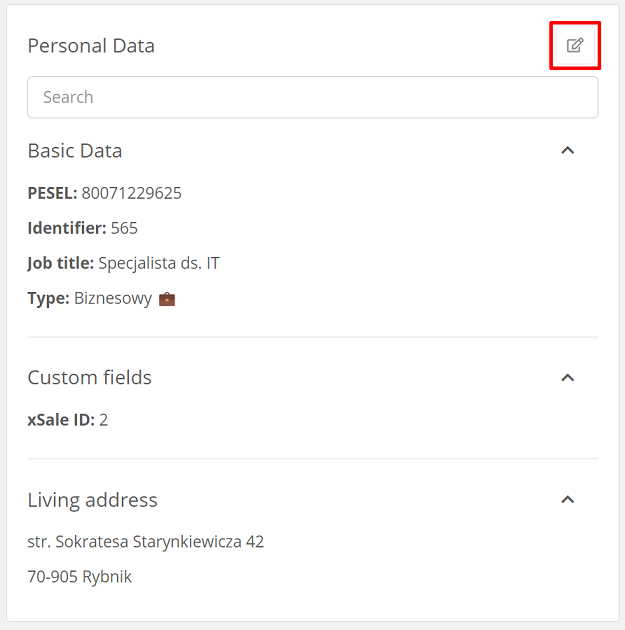
4. As mentioned above, you can enter more data after creating a client by clicking  :
:

Customer profile features
After adding a customer, go to his profile. On the left side you will find basic information about the customer - name and phone number. The rest of the data (e.g. email address) is optional and appears if it was filled in when creating the customer. It is also possible to add an avatar - just click or drag a photo/picture.
After clicking on  , the following functions appear:
- View tickets - preview all tickets of the client,
- Send SMS - send SMS,
- Add to campaign - add customer to campaign,
- Add to blacklist - add customer to blacklist,
- Mark as VIP - marking a customer as VIP,
- Merge customers - ability to merge contacts,
- Hide on customer list - the ability to hide a customer,
- Delete - delete customer.

Next Episode 3. Infoline

Share your opinion with us