SellRocket

Author: Łukasz Strumiński
Created: 2024-07-31. Updated: 2024-07-31.
Move hundreds of listings automatically from SellRocket every day to new marketplaces. Don't waste time - your listings will master the best marketplace platforms in no time. Flexible order processing, automatic invoicing and package fulfillment in one environment are just a few advantages of this solution.
For more information on this feature, visit SellRocket.
We will show you step-by-step how to integrate Thulium with the SellRocket platform.
From the Administration tab, select Advanced → Integrations.

A window with available integrations will appear on the screen - select SellRocket from the E-commerce section.

Then authenticate the application:

- API Token - token that gives the integrated application access to your account on SellRocket,
- API URL - individual API address necessary to establish a connection between applications,
- Integration name - custom name of the configured integration,
- Allegro or eBay customer login - field for storing the login from an external marketplace (as one of the custom fields) that should be created in the Thulium system as a text type).
You will generate the API token after logging into the SellRocket system in the Connections section. You will need to create Beel connections and enter X-BLToken in the header.


After entering the Token in the Thulium panel, click  to authenticate the integration.
If the authentication is successful, an appropriate message will appear on the screen:
to authenticate the integration.
If the authentication is successful, an appropriate message will appear on the screen:

By clicking on the  button, we can start re-authentication.
Once the application has been authenticated, complete Other data.
If the rest of the data has been entered as part of the integration configuration in the Thulium panel, such integration can be saved by clicking  or save and run
  at the same time.
In the case of saving alone, SellRocket integration should then be launched:

To launch another integration with the same E-commerce platform, click  and re-enter the relevant authorization and configuration data.
When such integrations are launched, this information will be visible in the list of integrations under Administration → Integrations.

How to integrate the customer.
For the first synchronization of the customer database in SellRocket and Thulium, click the  button located in the Customers tab at the top right of the page in the Add section. Subsequent synchronization of new customers (new orders) is done automatically (every half hour) and there is no need to use this button.

After clicking the button, a window will appear with a confirmation of the synchronization.

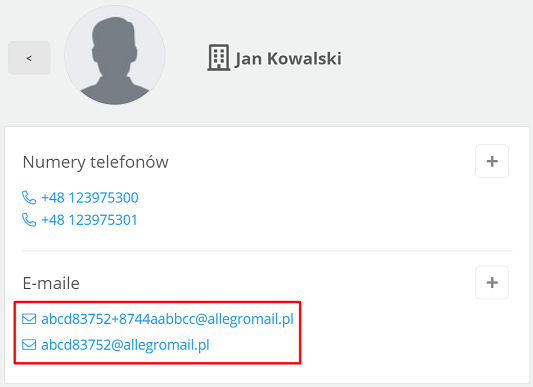
See what an integrated customer card looks like:

A new SellRocket tab appears on the right-hand side, where you can find basic information about the customer (including e-mail and user login) and their orders.
In addition, orders are available within the Contact History in the ORDERS section:

In the case of also running Allegro integration and indicating the same text type field for Allegro login as SellRocket integration uses, when adding customers from this platform, such login will be added if it is in the order. In addition, it will also result in the download of two email address formats that are hashed (with “+” and without “+”). Another advantage of using these two integrations is the ability to retroactively assign requests from the allegromail.pl domain to newly imported SellRocket Customers.
This action is aimed at streamlining the assignment of tickets to a particular customer's card.
Important...⚠️
The customer's order history includes the 100 most recently completed orders.

Share your opinion with us