Forwardings

Author: Dominika Stelmach
Created: 2018-03-09. Updated: 2018-03-23.
Forwardings allow you to properly direct incoming calls. Calls can be directed to defined infoline queues, to iVR tree depending on work hours and available agents, as well as they can be disconnected. Properly configuring redirections will help you better serve your customers.
You can manage the forwardings by going to the Administration tab and selecting Telecommunication → Forwardings.

Did you know...
After creating an account, a forwarding with your infoline number is created by default - you can check how it works.

You can add new forwarding by clicking  . You will open the card on which the following fields appear:
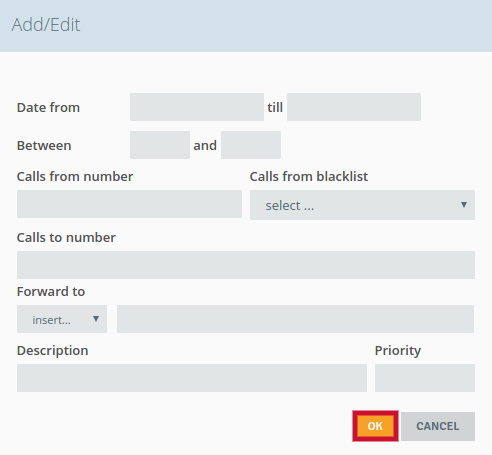
- Date from-till - define in which range of time the forwarding will be active, for example: 1-28th February
- Between-and - define in which hours the forwarding will be active. for example: 8 AM - 4 PM
- Calls from number - enter a number from calls will be forwarded
- Calls from blacklist - select the blacklist with numbers that you for example want to disconnect
- Calls to number - enter the number, after selecting which the forwarding will work
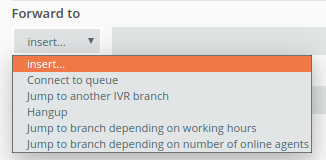
- Forward to - select the way to fordward the connection
Possibble actions:
- Connect to queue: queue(queue_name)
- Jump to another IVR branch: ivr(branch)
- Hangup: hangup
- Jump to branch depending on working hours: schemagoto(working_hours,branch1,branch2,branch3)
- Jump to branch depending on number of online agents: agentgoto(queue_name,count,free/online,branch1,branch2)
Additional actions:
- Voice mailbox settings: voicemail_456, where as 456 you can enter any number
- Conference settings (connection with several people in the same time): conference_456, where as 456 you can enter any number
- Description - you can enter a description, for example: a short note explaning the forwarding
- Priority - determine the order of forwarding
Important
If you want to create a forwarding it is nessesary to complete the field Calls to number and select the type of forwarding (for example: connect to queue). Other data is optional.
You save the forwarding by clicking the button  .
.
Created redirections will appear in the table - you can edit them at any time and specify their activity.
Below are some examples of redirections so that you can better understand their operation.
/screen/

Share your opinion with us