Adding customers

Author: Łukasz Strumiński
Created: 2017-11-10. Updated: 2025-09-16.
The Customers tab is a database of your customers. By placing them in the CRM, in addition to collecting all information about the customer in one place (including phone number, email address, address details) you can see the entire history of contact with them.
You can add customers to the CRM in two ways - by adding individuals (or companies) or by importing ready-made databases in CSV format.
Customer/company profile functions
Importing customers (companies) from CSV files
Go to the Customers tab, expand the  button and select Add person.

You will open the module of simplified addition of a new customer - fill in their data:
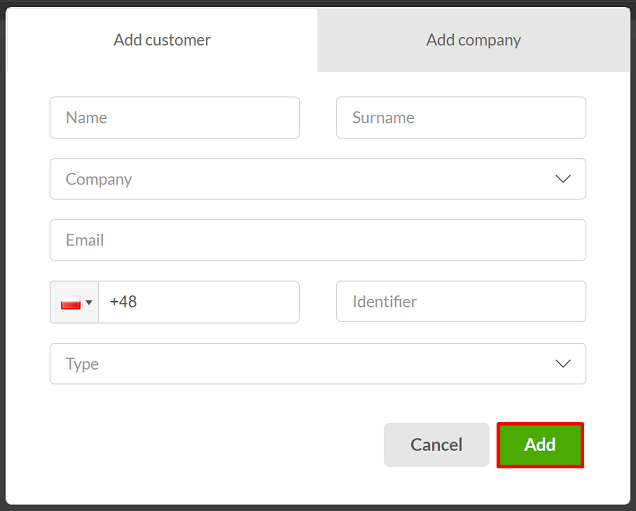
Did you know...💡
To add a customer, simply fill in the field "Surname" or "Phone number". The rest of the data is optional.
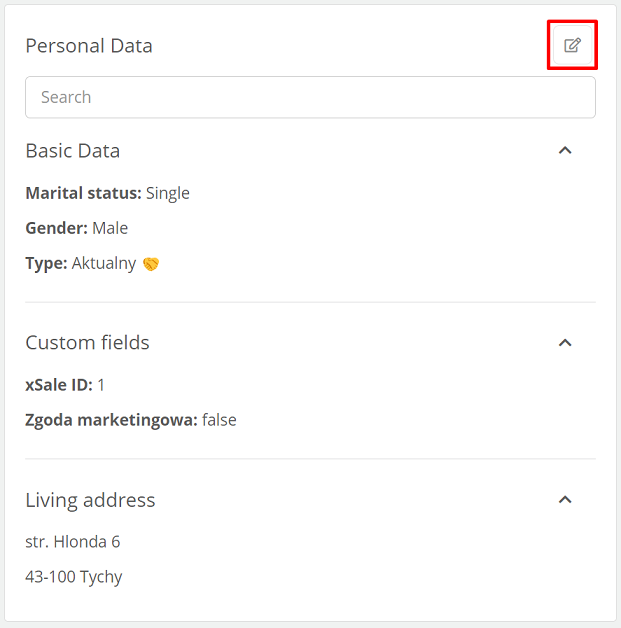
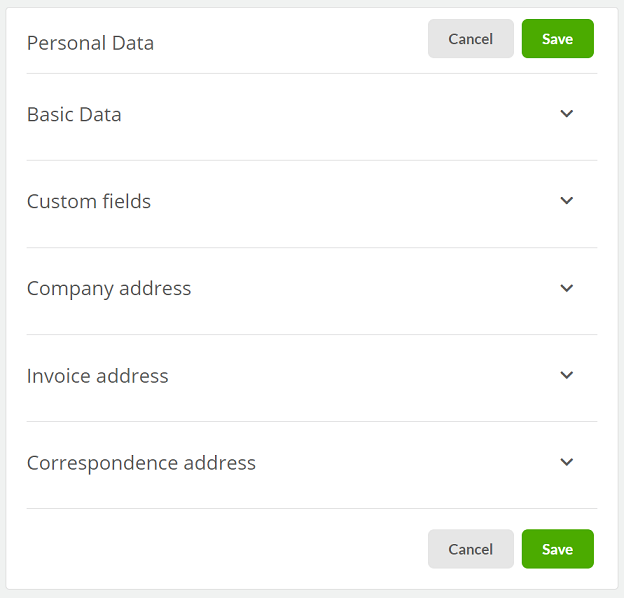
After creating the customer's card, you can complete the rest of the data by clicking  .
.
-
In the Basic Data section, you can fill in such data as first name, last name, PESEL, ID, date and place of birth, and information related to the work performed - company name, position and industry. In addition, you can assign a customer to a specific type and group.
-
In the Custom fields section, you can fill in additional information about the customer, e.g. regarding orders.
- In the address sections, you can fill in contact information (home address, mailing address and billing address).
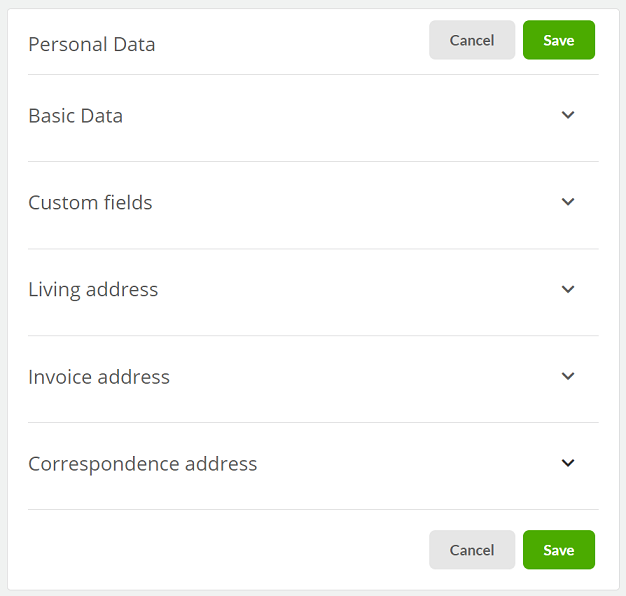
After completing the data, click  .
.
To change or delete a phone number or e-mail address, click  or
or  . Adding another phone number/email address is possible by selecting
  .
.
When adding/editing a phone number or e-mail address, additional descriptions can be entered:

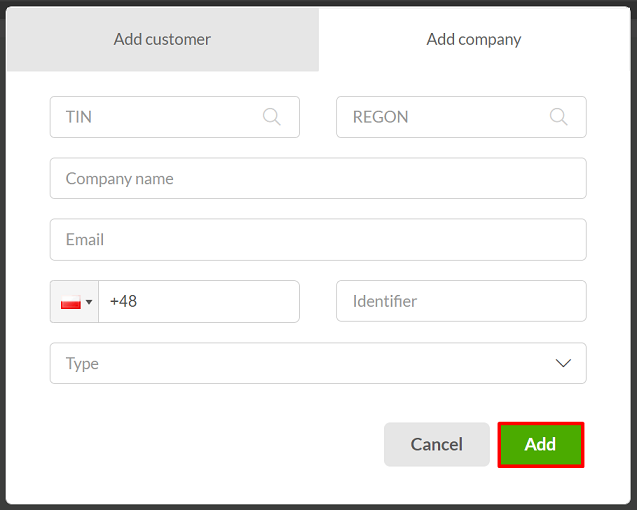
Go to the Customers tab, expand the  button and select Add company.

You will open the module for simplified addition of a new company - fill in its data:
Did you know...💡
After entering either TIN or REGON, in both cases without dashes or spaces, it is possible to search for the rest of the data from the GUS by clicking  .
.
After creating a company card, you can complete the remaining data by clicking .
-
In the Basic Data section, the following data appears: Company name (required field), ID, customer type and group, TIN and REGON numbers, company website address.
- Other tabs allow you to add custom fields and provide address data.
After completing the data, click the  button.
Did you know...💡
From the company edit level, you can also search for company data from the GUS by entering the 10-digit TIN number (without dashes and spaces) or the 9-digit REGON number (without dashes and spaces) by clicking .
To change or delete a phone number or e-mail address, click or . Adding another phone number/email address is possible by selecting .
When adding/editing a phone number or e-mail address, additional descriptions can be entered:
Customer/company profile functions
After adding a customer, go to his profile. On the left side you will find basic information about the customer - name and phone number. The rest of the data (e.g. email address) is optional and appears if it was filled in when creating the customer. It is also possible to add an avatar - just click or drag a photo/picture.
After clicking on  the following functions appear:
- View tickets - preview all tickets of the client,
- Send SMS - send SMS message to customer,
- Add to campaign - add customer to campaign,
- Add to blacklist - add customer to blacklist,
- Mark as VIP - marking a customer as VIP,
- Merge customers - ability to merge contacts,
- Hide on customer list - the ability to hide a customer,
- Delete - delete customer.

Importing customers (companies) from CSV files
Did you know...💡
CSV is a format for storing data in text files. This format is supported by most popular office packages (including Microsoft Office, LibreOffice).
If you want to add more people to the CRM, it is best if you import a ready-made file in CSV format. Go to the Customers tab, expand the  button and select Import people from CSV file (Import companies from CSV file) - we'll show you how to do this with an example of adding a group of people.

You will be taken to the import page.

Attach the CSV file with the record database - click  . Remember that your file should have headers. A table with imported data will be displayed on the screen. Match the headers from the file to the headers in the database (data mapping process). Unmatched headers will be highlighted in red.

Did you know...💡
By clicking the cross next to the column headers in the database, you can delete the selected column - it will then not be downloaded from the CSV file.
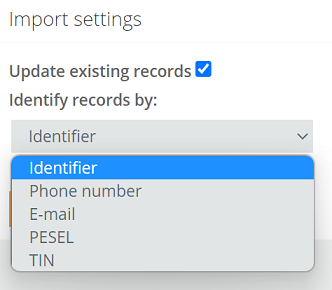
Checking the Update existing records option will allow you to update existing records already in the database without adding them again. If a customer appears in the file that is in the CRM then only additional data will be completed.
Recognition of records can be done by:
- ID
- phone number
- e-mail address
- PESEL number
- TIN
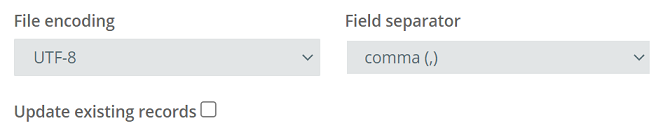
By expanding the option "Show advanced" you can set:
- how Polish characters are encoded
- UTF-8 - default
- ISO 8859-2
- Windows 1250
- how columns are separated
- comma (,) - default
- semicolon (;)
- colon (:)
- tab (-)
The parameters should be the same as in the file you are attaching.
If the data matches, click the  button. You will receive a message that the import is complete and you will be transferred to the list of customers.
Important...⚠️
To correctly import gender the format in the file should be: F - for female, M - for male.
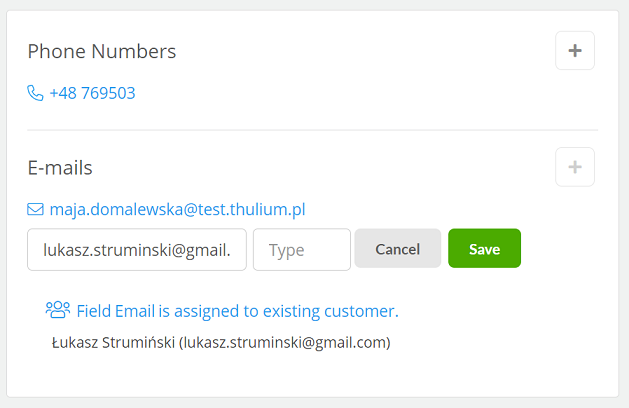
If you enter, for example, an email address that already exists in the CRM when adding a new customer (person or company), the system will display a window stating that the email is already assigned to an existing customer along with a link to their card.
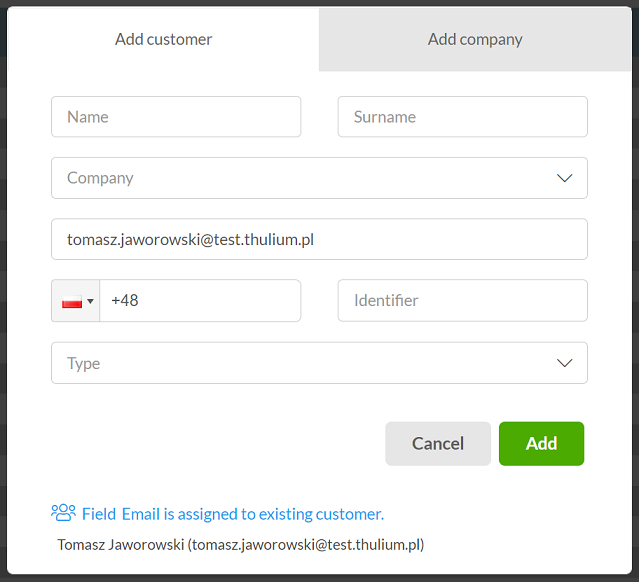
When adding a customer, the following data is checked:
- phone number
- e-mail address
- company name
The same mechanism works when editing a particular card:

Share your opinion with us