Custom fields - CRM

Author: Łukasz Strumiński
Created: 2022-12-27. Updated: 2025-09-17.
Custom fields are fields where you can enter additional information that allows you to expand your knowledge about your customers, e.g. information about the customer's company. When creating a field, you specify what type it should be - it can be plain text, a list, a date, or even a link directing to the company's website.
Important...⚠️
Custom fields are defined for all customers. You can add as many fields as you want.
From the Administration tab, select CRM → Custom fields.

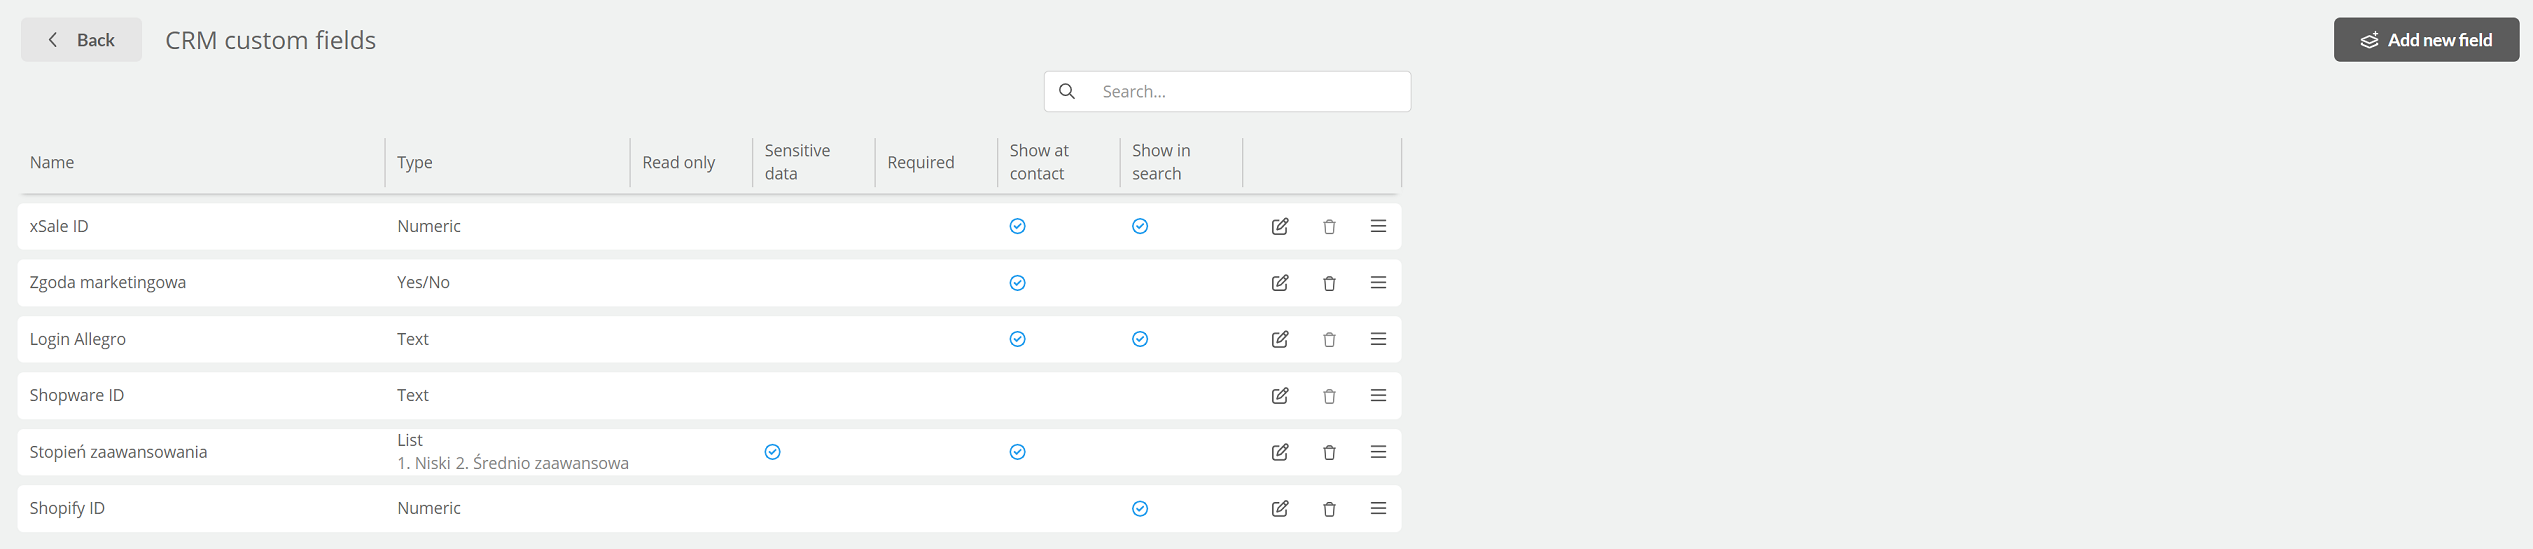
To add a new custom field, click  .
.
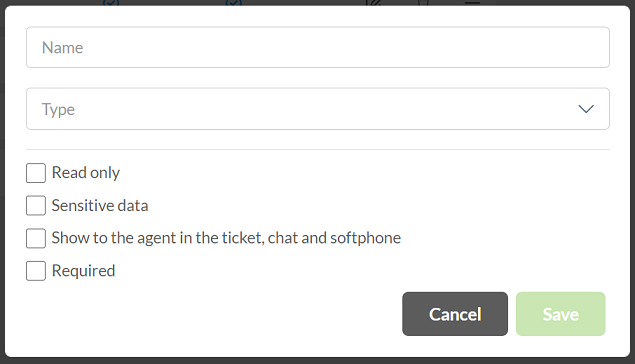
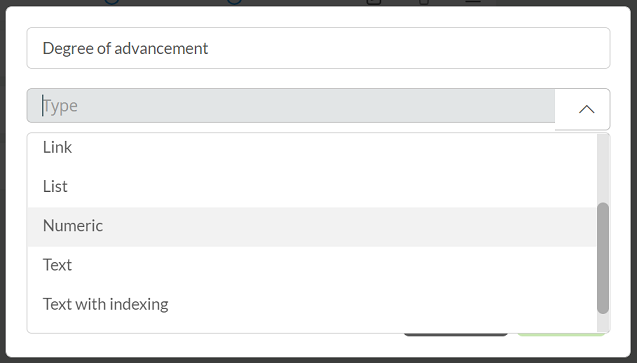
Next, we enter a name for the custom field in CRM and select its type:
- Date,
- Large text,
- E-mail,
- Numeric
- Link,
- List,
- Yes/No,
- Text (maximum number of characters: 100),
- Text with indexing - text that allows the text to list itself while searching, i.e. "prompting" for words while typing.
For a list type field, to add such an item, click the  button and enter the name of the item.
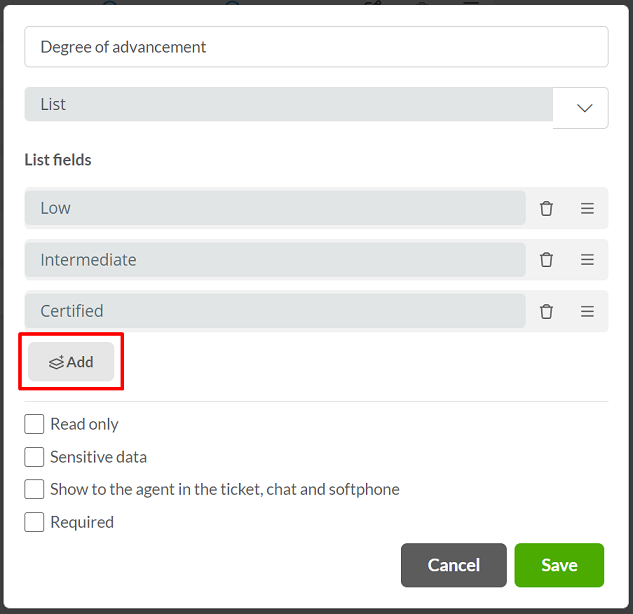
To change the order of an item from the list, hold down  , to delete click
  .
.
For custom fields, you can mark the following parameters:
Read only - when this option is checked, the user will not be able to edit the field. This option is useful if, for example, customer data is imported from outside and you do not want agents to be able to modify it.
Sensitive data - access to the data will be possible only through the appropriate authorization.
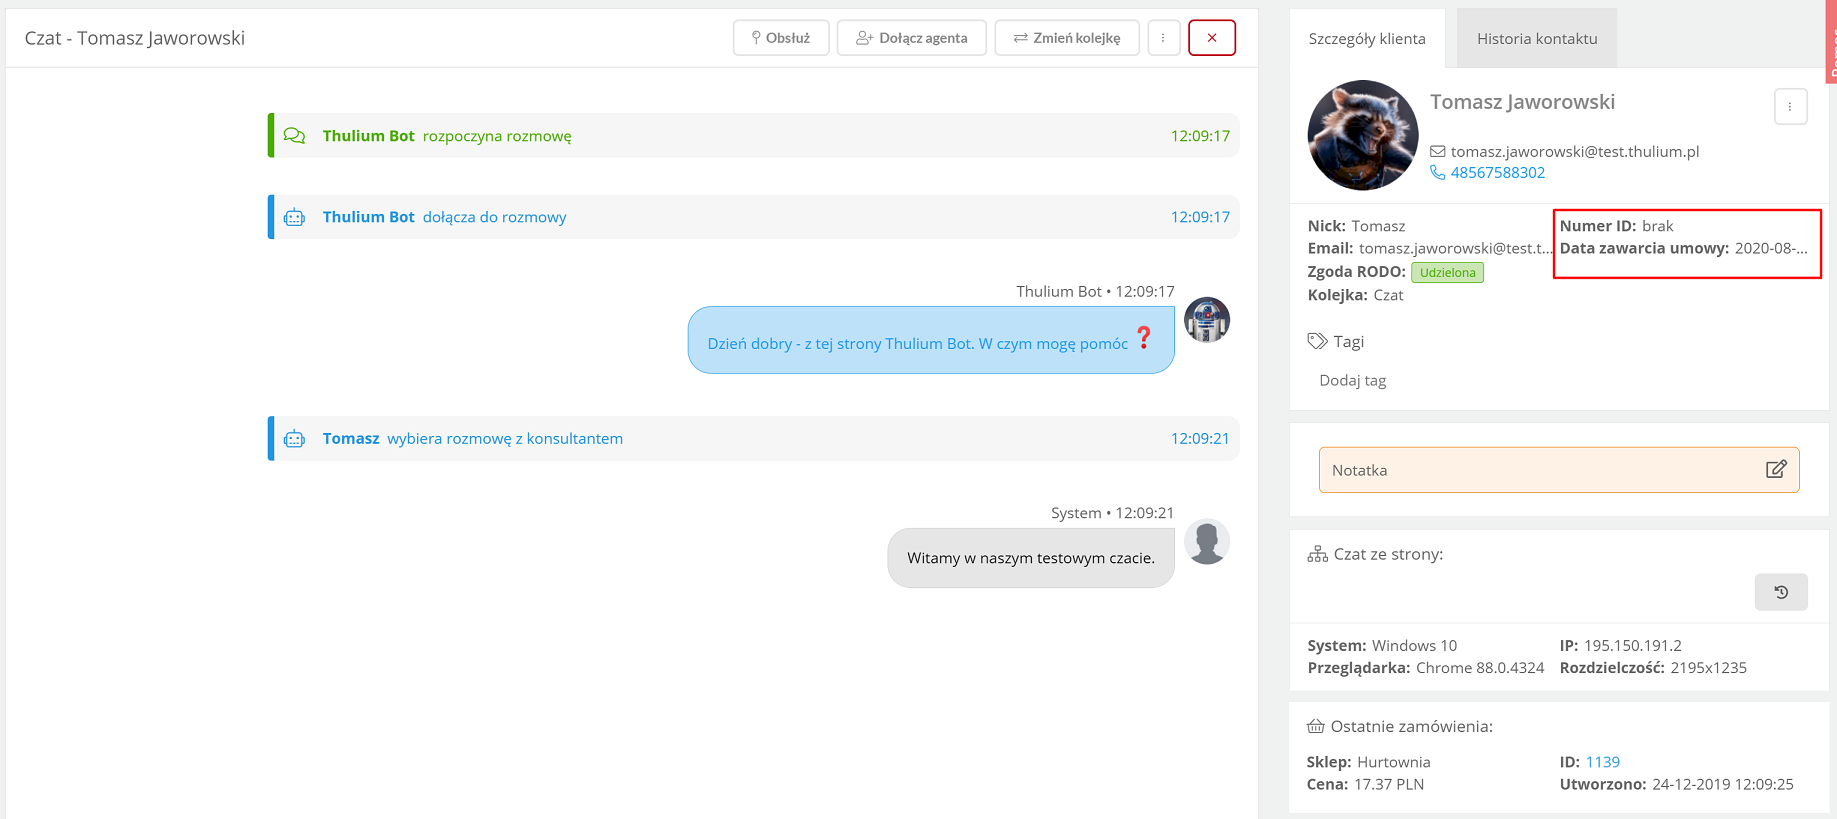
Show to the agent in the ticket, chat and softphone - with this option it will be possible to see custom fields when talking to a customer in chat and when contacting by email as well as by phone. This allows the agent to quickly see, for example, what services the customer is interested in.
Show in search - allows you to search within CRM by a given field.

Required - when this option is checked, the agent will have to complete the special field before saving.
After entering all data, click  .
.
Within the added special fields, it is possible to change their display order by holding  , to delete them click
  . Editing such a field is possible by selecting
  .
.
View of custom fields on the ticket form:

View of custom fields during WebSoftphone call:

View of special fields during chat:
The created custom fields will appear in the filters - this will allow advanced customer search:


Share your opinion with us