Creating chat queues

Author: Łukasz Strumiński
Created: 2018-03-16. Updated: 2023-01-05.
A chat queue is a place where customers wait to speak with a free agent. You can create several queues, which will define the issues with which customers ask (e.g. Technical Support, Complaints). The customer selecting the appropriate queue (topic) will be directed to the right people who will help him solve the problem.
Let's create an example queue. From the Administration tab, select Click2Contact → Queues, and then click  .
.


A window will appear on the screen where you configure the queue settings.
Basic options
- Name - enter the name of the queue,
Hint...🎯
If you want your widget to have several queues directing to different issues - pay attention to their naming. The names of the queues should reflect the actual reason for contact, e.g. Complaints, Orders, etc.
- Schedule - specify during which operating hours the queue will be active,
- Welcome message - enter the content of the message that will be displayed to the customer when the chat starts or when a new agent has joined (you can configure the message display in the chat parameters,
- Active - whether the queue should be available within the chat service.
Autoresponder
- Enable autoresponder - the ability to send an automatic first reply after a customer message if the agent does not reply for a certain period of time,
- Answer automatically after (s.) - set the time after which the reply will be sent,
- Response text - enter the content of the message that will be displayed in the chat.
Adding a ticket in the Panel during a conversation
- Default ticket subject - subject of a ticket created from the chat,
- Default ticket queue - select the queue to which chat submissions will be directed.
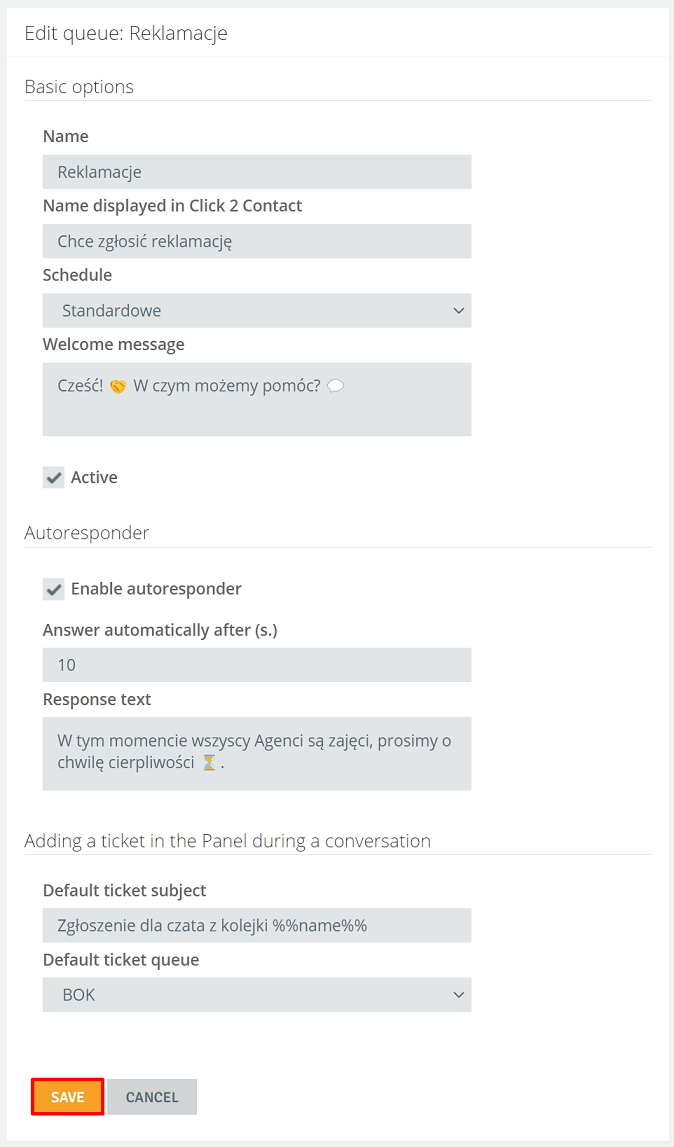
Once completed, click  .
.
By entering the selected queue, you can edit or delete it. You will also assign agents from here - in the Assigned agents section.
Important...⚠️
The queue for which chats have been conducted can't be deleted.

Share your opinion with us