Sending and receiving messages

Author: Łukasz Strumiński
Created: 2023-05-10. Updated: 2024-10-07.
If you want to send a new ticket, click the  button on the left side above the list of tickets.
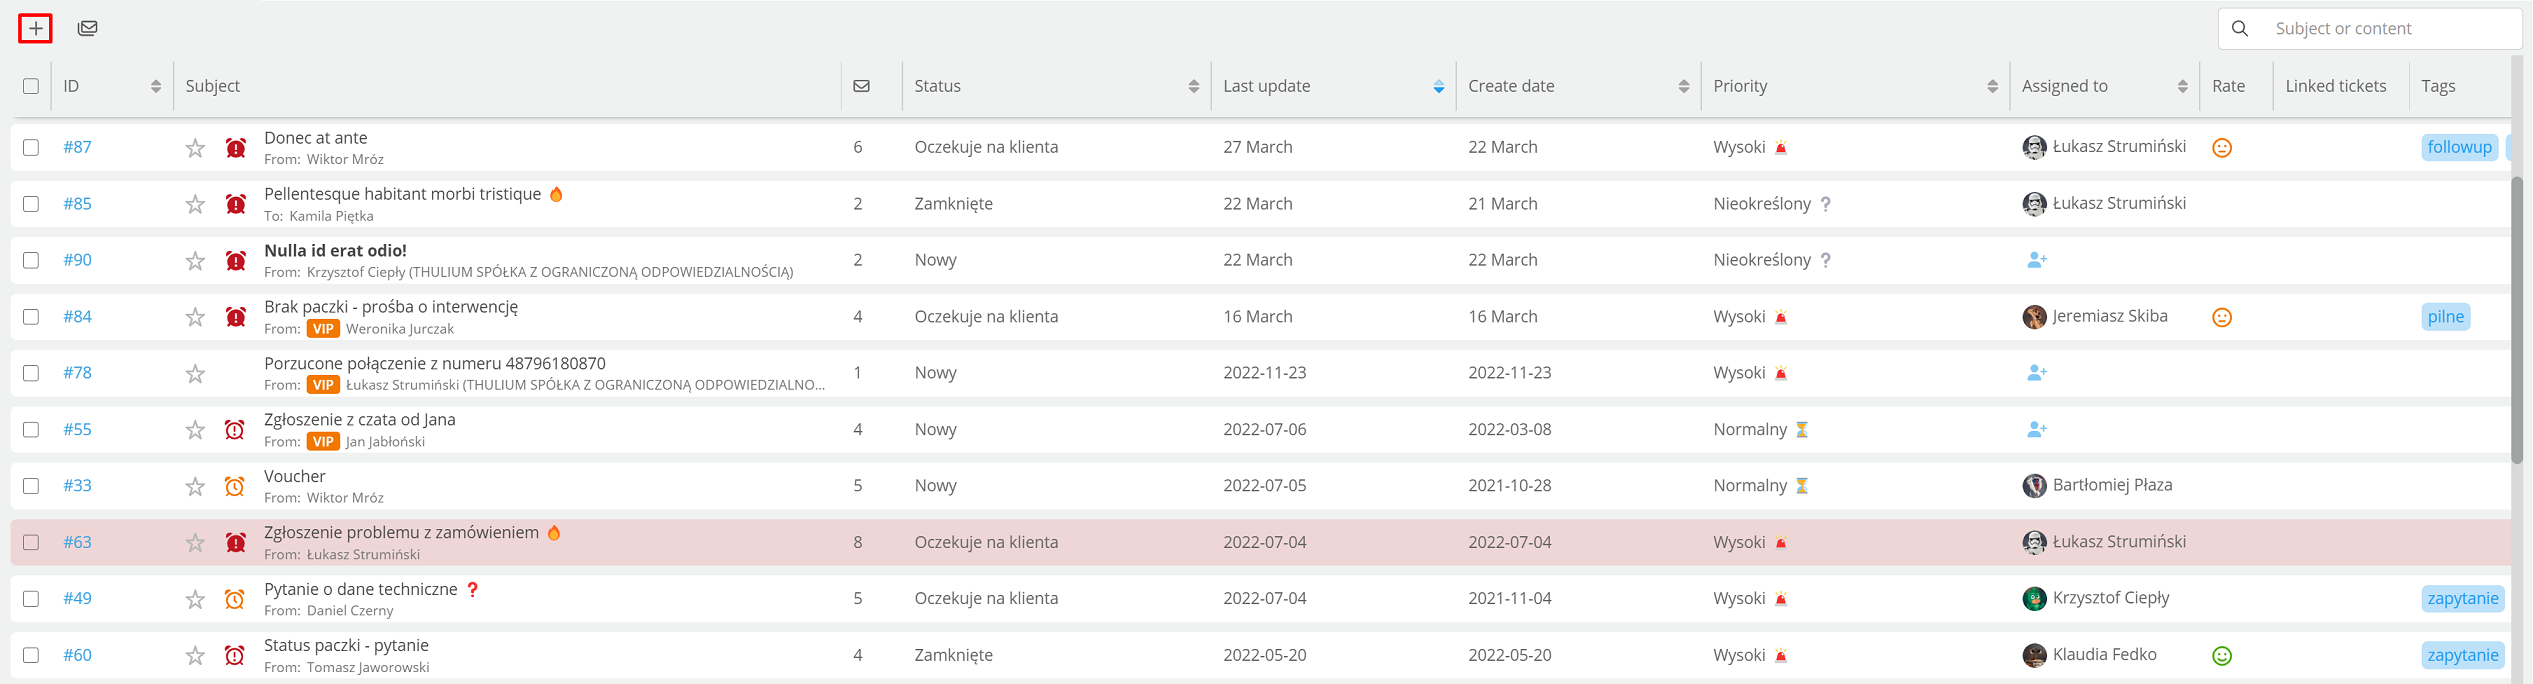
See how our add ticket sheet looks like.
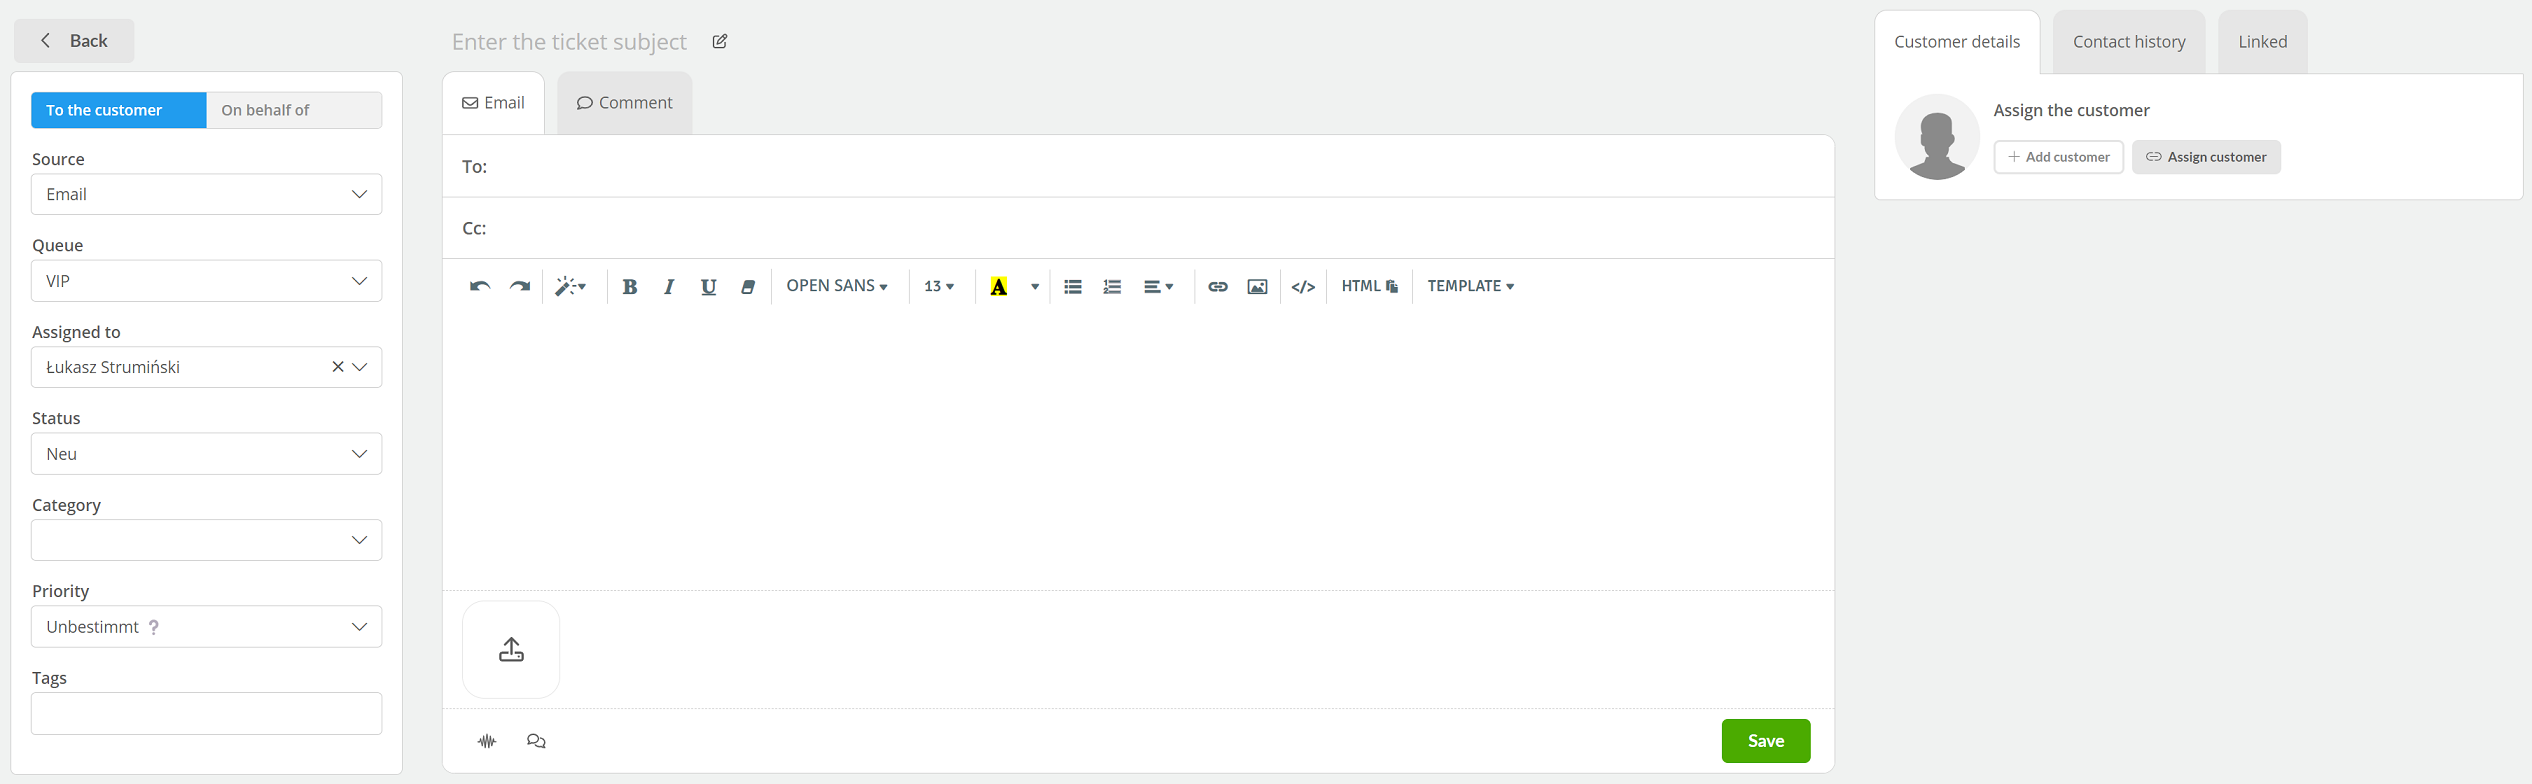
In the left section we have available:
- To the customer - user sends message to customer,
- On behalf of - user sets up a ticket on behalf of a customer,
- Source - ticket source: Phone, Email, SMS, Chat,...,
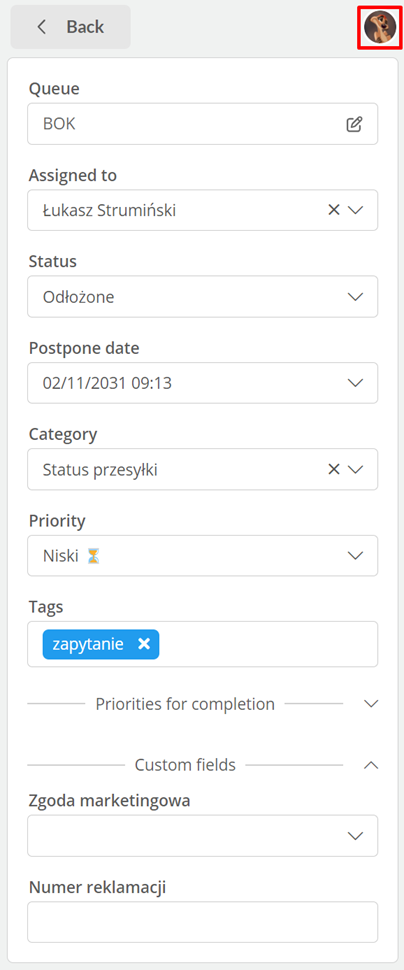
- Queue - select an ticket queue,
- Assigned to - assign a user to handle the ticket,
- Status - select ticket status,
- Category - select an entry category,
- Priority - select ticket priority,
- Tags - possibility to tag the ticket.
In the central section you will find:
- Topic - subject of the ticket,
- Email - option to send an email or enter content on behalf of the customer,
- Comment - opportunity to leave a comment on the ticket,
- To: / From: - customer's e-mail address,
- Cc: - people in the copy who also get the message, you can enter a maximum of 30 addresses,
- Content - message content, you can add a ready-made message template,
- Add attachment- option to add an attachment for the customer e.g. screen, the maximum file size is 25 MB,
- Link the conversation - ability to link a phone call from today to a ticket,
- Link chat - option to link the chat from today to the ticket.
In the right section, we have:

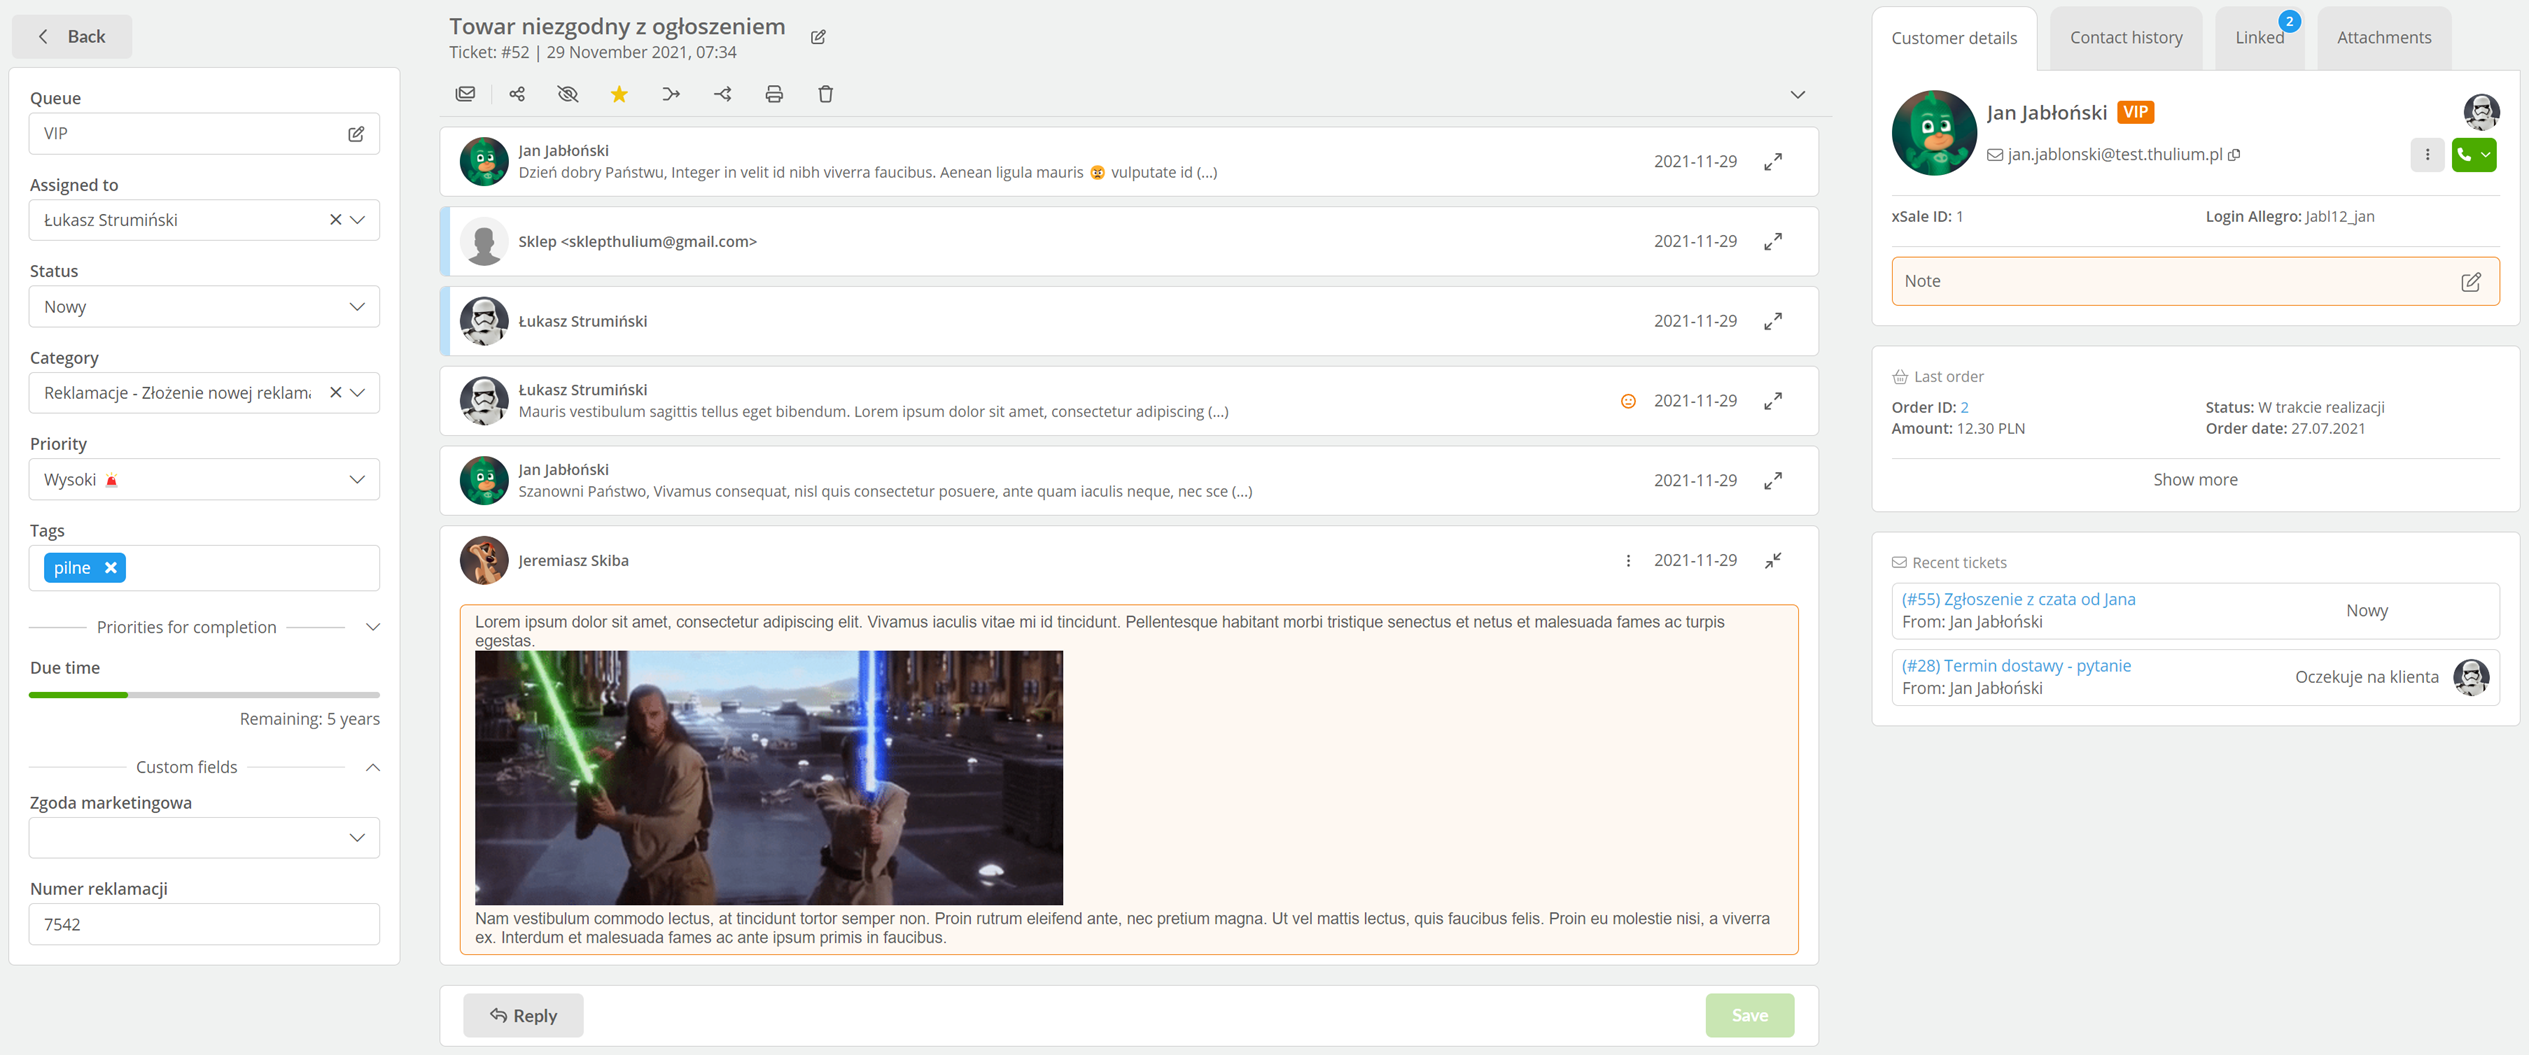
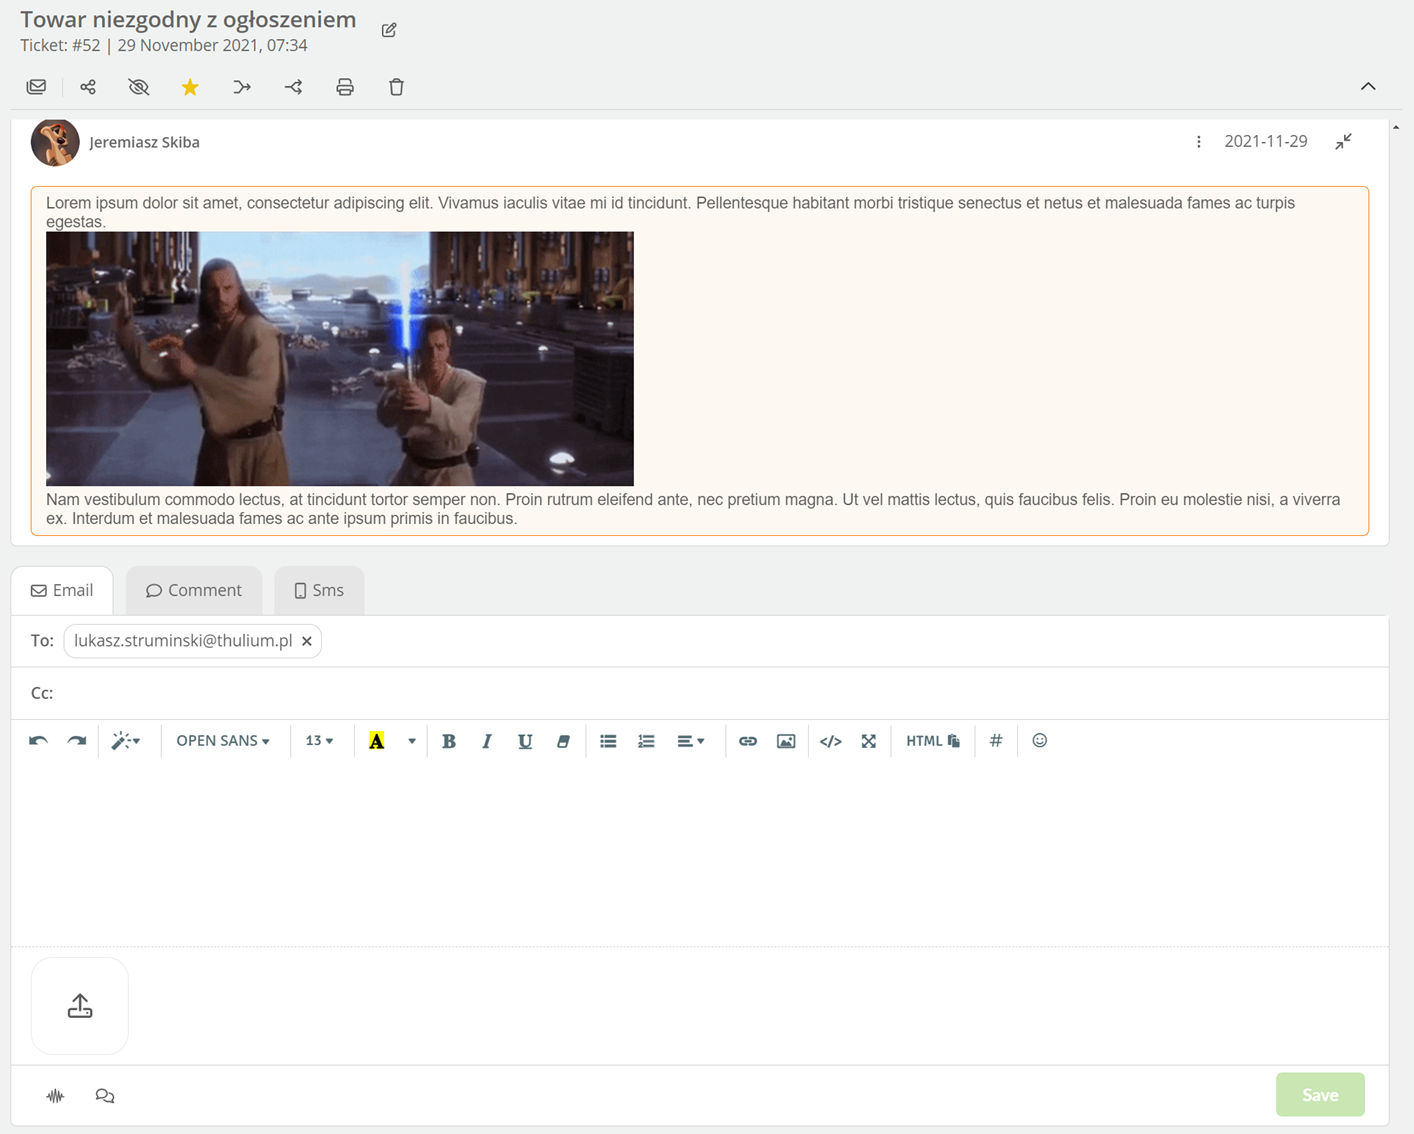
- Customer details - information about the pinned customer to the ticket,
- Note - CRM note of a particular customer,
- Recent tickets - last three tickets from a given e-mail address or pinned on a given customer,
- Last order - last order from the e-commerce platform of a given CRM customer.
Important...⚠️
To send a message you need to fill in the subject of the message and select the ticket queue.
When writing a message you have the option to change the font size, type and color. You can set the default font - you configure it in ticket parameters.

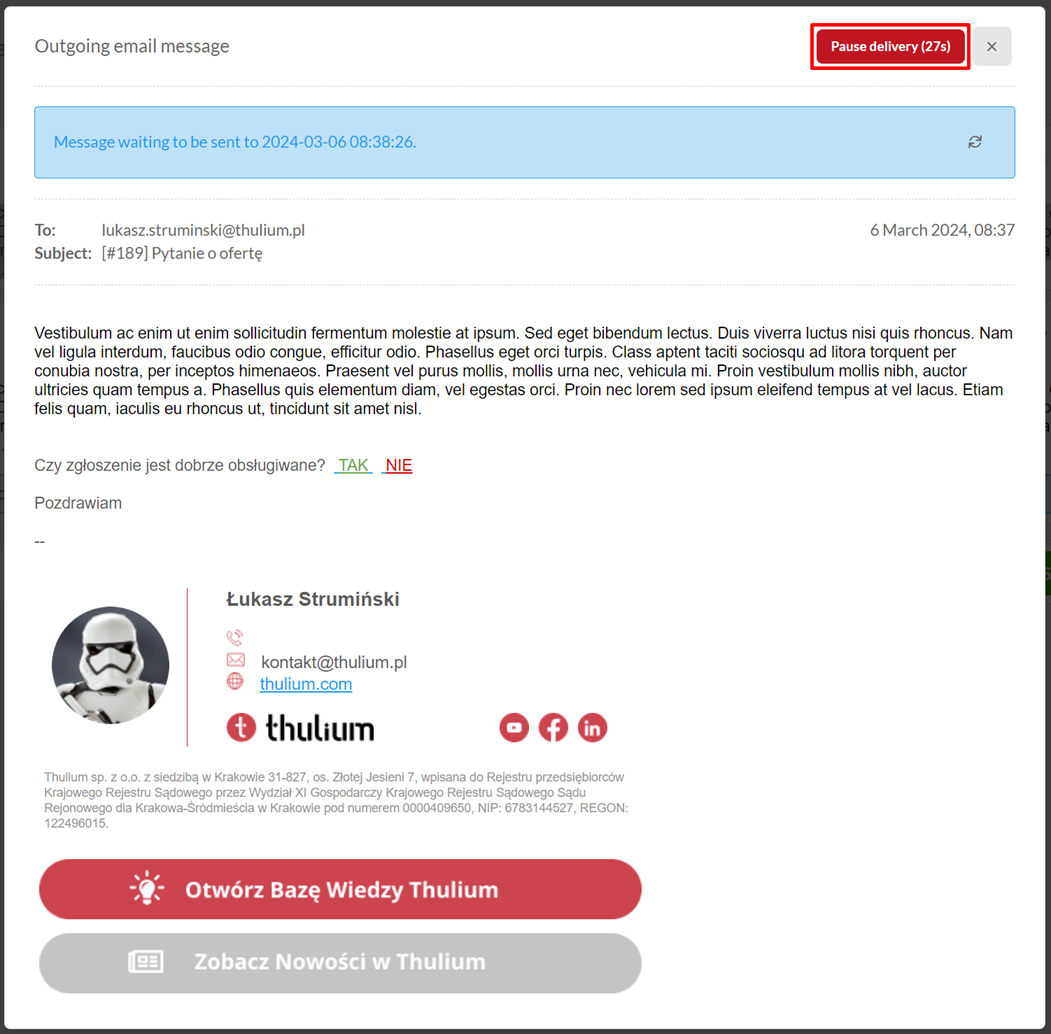
When sending a message, you can set the delay with which it will be sent (the default is 30 seconds). This will allow you to cancel sending the message, for example, in case of a mistake.
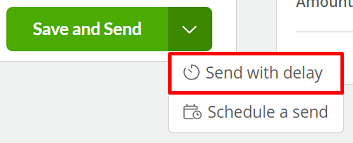
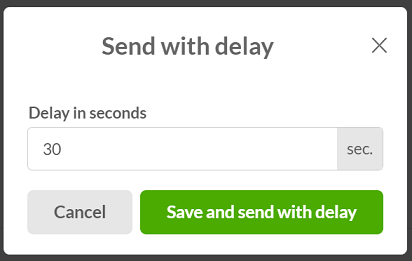
When you press  , a message will appear informing you of the time the message was sent. By clicking Cancel the message will not be sent.

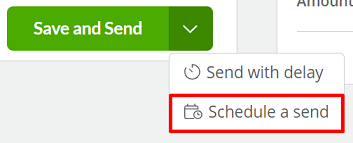
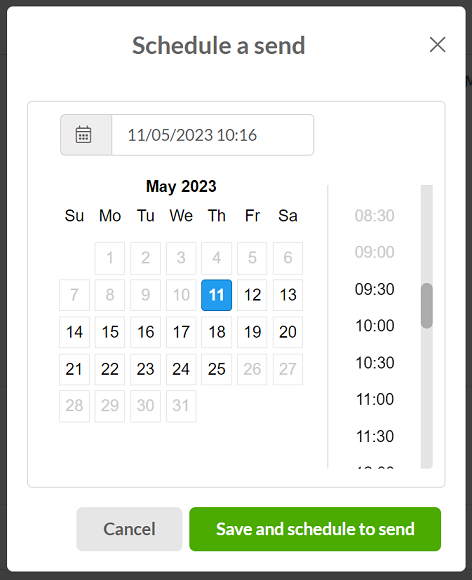
You can also schedule the message to be sent on a specified date up to two weeks in advance:
Did you know...💡
Tickets consisting of a comment alone are not displayed in the contact history.
Important...⚠️
Messages to Thulium are pulled based on read/unread status - messages unread from the Inbox folder or any other folder indicated in the mailbox configuration are pulled.
If you receive a new message it will be signaled in the user panel and in the browser tab:


In the ticket list, the subject of the new message will be in bold.

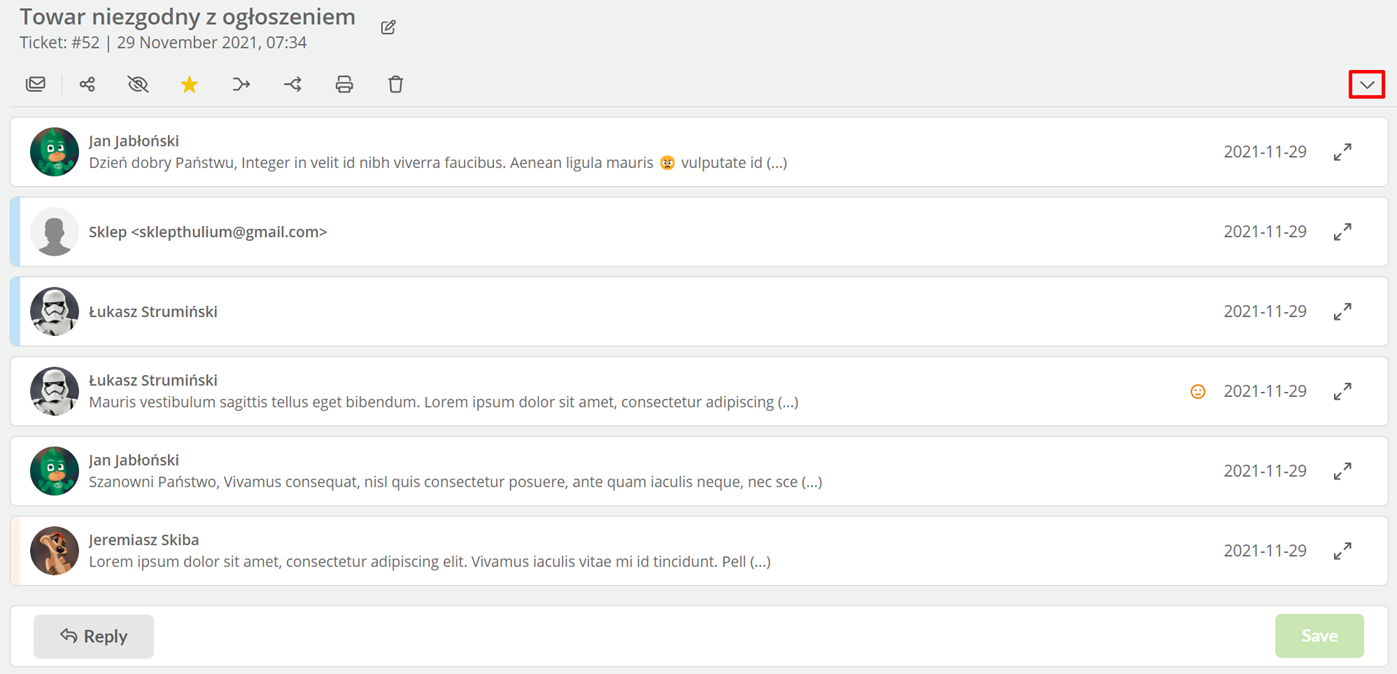
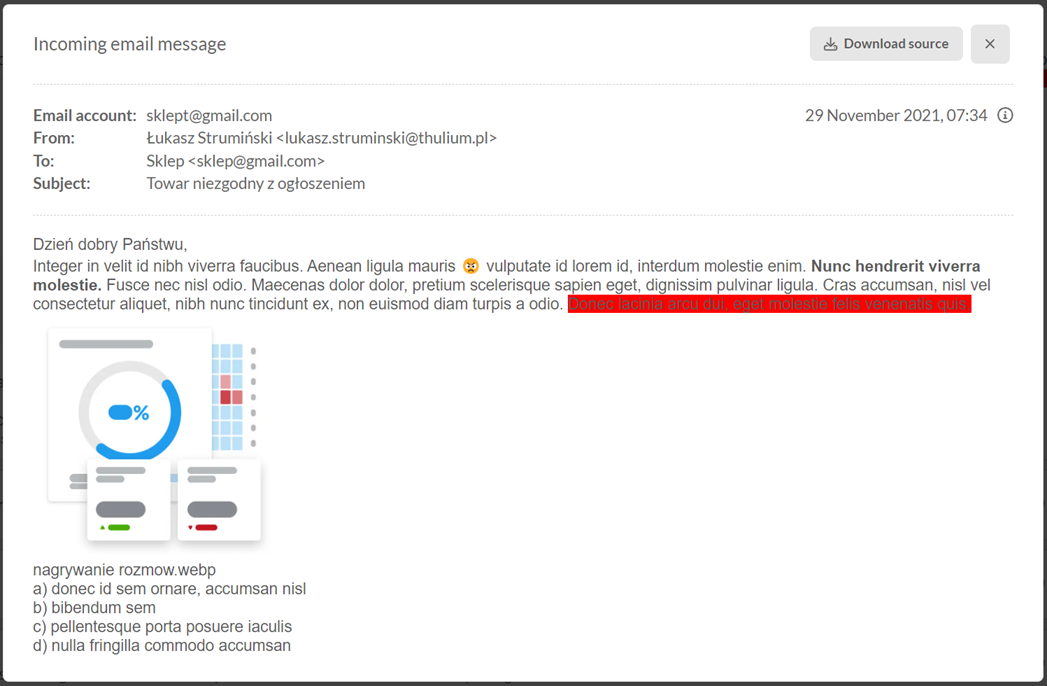
Enter the ticket by clicking on the subject of the message - this card is slightly different from the new ticket.
To respond to a ticket or leave a comment, click the 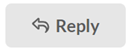 button at the bottom of the central part of the ticket.
Assigning a customer to a ticket
If you are written to by a person you do not have in the CRM database, you can easily add him/her to the ticket or assign this ticket to an existing customer (for example, if the customer sent the message from a different email address). By default, the system itself assigns the customer to the ticket based on their email address.
- Add customer
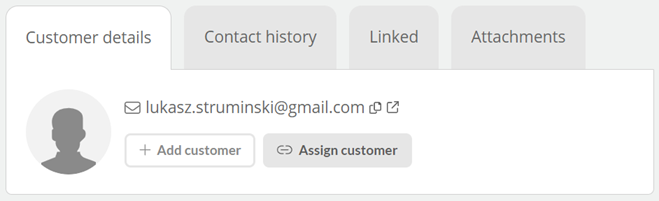
Ability to add a new customer, which will be assigned to this ticket and placed in the customer database. A window will appear on the screen where you can add a person, a company or a person assigned to a company - fill in the data and click  .
.
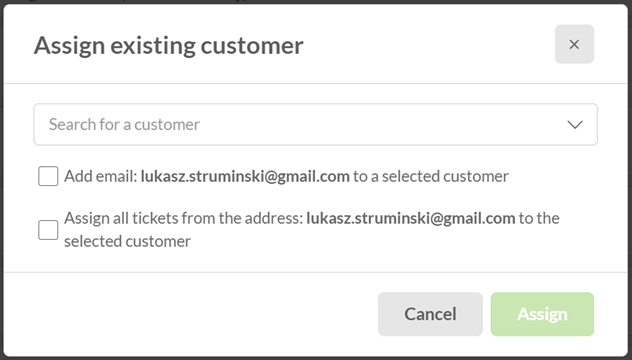
- Assign customer
You can also assign this ticket to a customer who is already in the CRM database - a window will appear where you can search for a person or company. Also decide whether you want to assign the e-mail address from which the message was sent to the customer and all tickets from this address.
- Unassign the customer
If you need to reassign a ticket to a customer or completely write it off from the CRM record, click  and select the appropriate option.

In the ticket will appear information in the form of a system comment.

Viewing contact history
To verify the contact history of a particular customer, select Contact History next to the section related to customer details:

The contact history is intended to help the agent verify that we have not had other interactions with a particular customer on different communication channels; particularly if the customer refers to one in the ticket.
Linking tickets
If you need to link tickets and subsequently track their completion, click Linked next to the section related to Customer details.
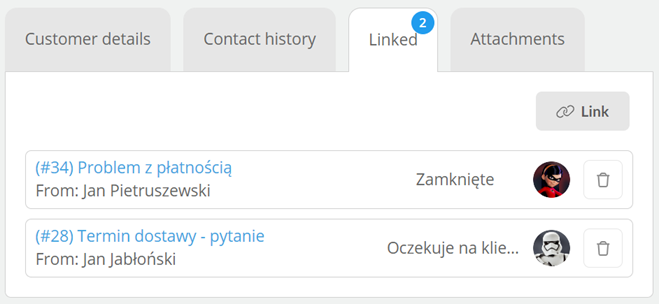
The blue marker indicates how many tickets we currently have associated with a ticket - in this case we are talking about two related issues.
To link another ticket with the one currently viewed, click  and a ticket search engine will appear:
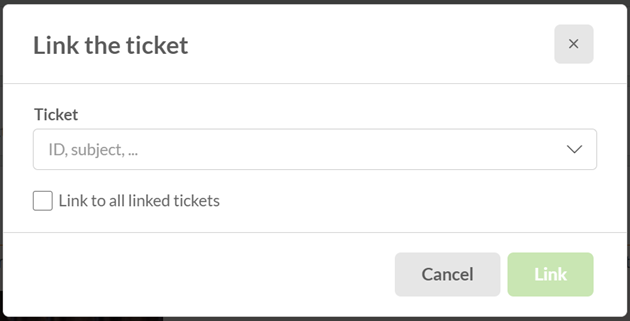
Checking the Link to all linked tickets option will link the ticket in question to related tickets to the ticket we selected.
Downloading and searching for attachments
You can search in the Attachments section for a particular attachment in the ticket or download it, or download all of them.
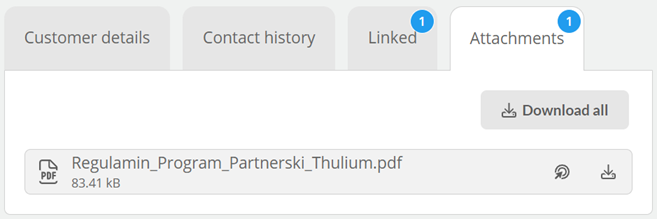
The blue marker indicates how many attachments we currently have in a ticket - in this case we are talking about one attachment.
Other users working on a particular ticket
In the left section above the ticket details, you will see the agent's avatar if such an agent is currently viewing the ticket:
The solution also lets you know that the agent is writing a message or comment.
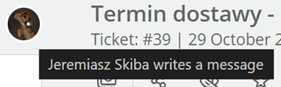
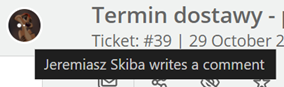
The message itself will appear at the bottom of the central ticket section when you open it:


Change of ticket queue
If you want to change the ticket queue to a different one, click  . When you change the ticket queue, you may also write off a ticket from a user if that user does not have access to the queue.
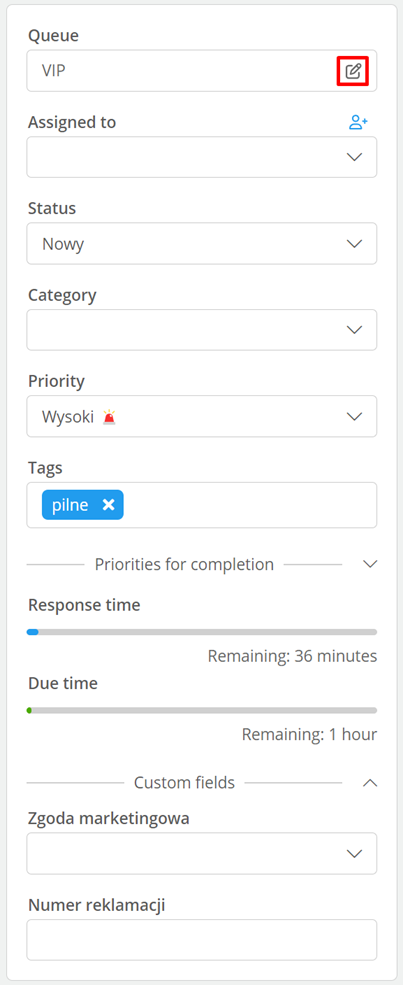
A window will appear on the screen where you can select a different queue and assigned user by approving the change with  .
.
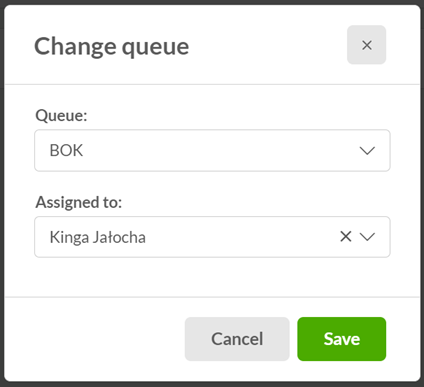
In the ticket will appear information in the form of a system comment.

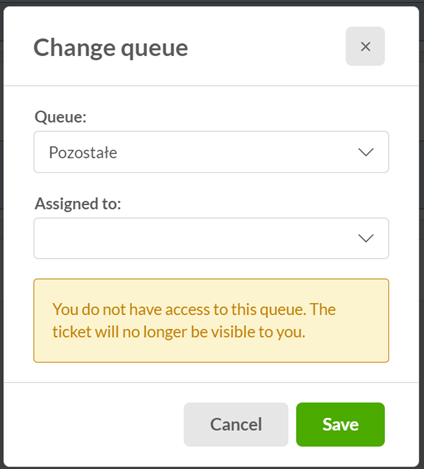
If we do not have access to the queue to which we are moving the ticket then a message will appear before the process is performed:
Did you know...💡
You can set the default queue to which tickets go in the rules for incoming messages.
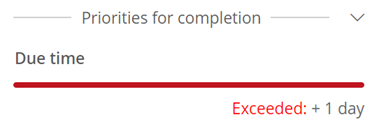
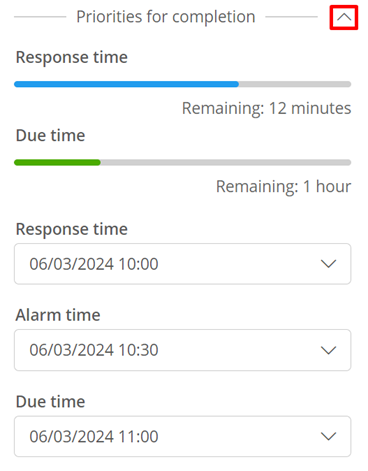
Priorities of completion
Within tickets, priorities related to the first response and first close of the ticket apply. When the ticket is displayed, we will be visually presented with the SLA goals for the ticket:
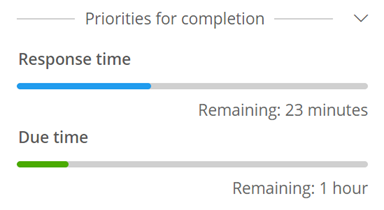
If this time is exceeded, an indication of what time is being referred to will appear.
By clicking on the  button, we can expand the view to show specific SLA cutoff dates:
Change of ticket subject
In the central part of the ticket at the very top next to the topic, there is an icon  after clicking which you enter the topic editing mode.

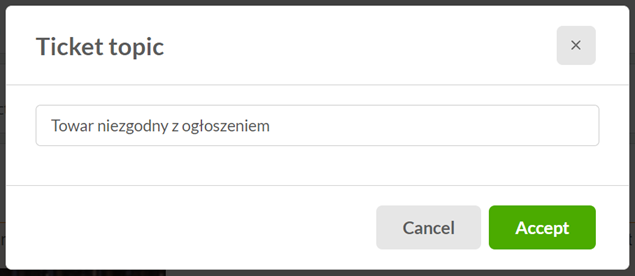
To confirm the change, click  , and then save the changes within the ticket.
Functional shortcuts

- Handle next ticket
 ,
, - Copy link
 ,
, - Observe
 ,
, - Remove star marking
 ,
, - Merge tickets
 ,
, - Separate
 ,
,
- New linked,
- New linked summary,
- Forward,
- Print all
 ,
, - Delete ticket
 .
.
Important...⚠️
To have the ability to delete tickets, contact Thulium Customer Service, who will grant the appropriate authorization. Remember that by deleting tickets the information about them will disappear from the contact history and reports.
The New linked function creates a new ticket, which will automatically be linked to the ticket from which we called this process.
In the case of New linked summary, a new ticket will be created, which will contain messages from the ticket from which we called this process, along with a brief summary of the status, id, customer data, etc.
The Forward option allows you to send the ticket information (along with messages and possibly comments) to a designated external email address. This is also a form of escalating the issue to an external team not operating in Thulium.
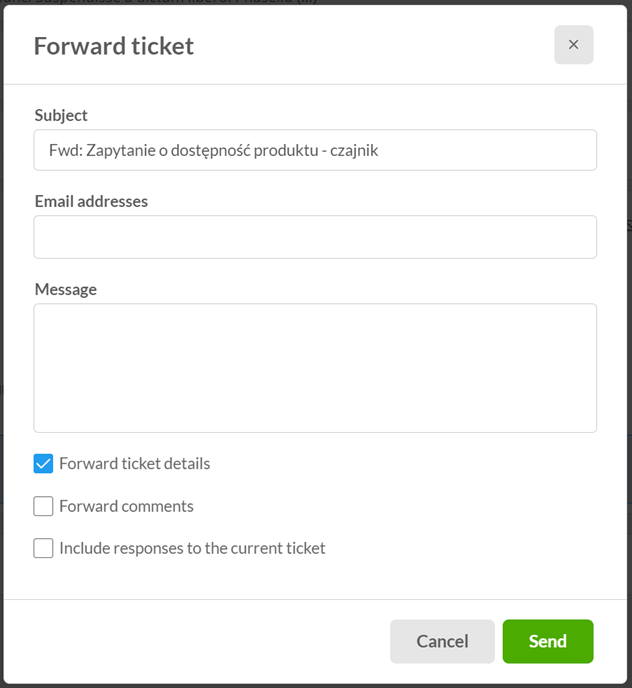
When you click the  button, the system will display the information as a comment.

Those to whom correspondence has been forwarded receive a message containing details of the ticket (including ID number, status and message subject), the user who forwarded the ticket, and a full history of the correspondence.
The Merge tickets action allows you to merge tickets from the same customer/client/company email address - these tickets cannot be closed.
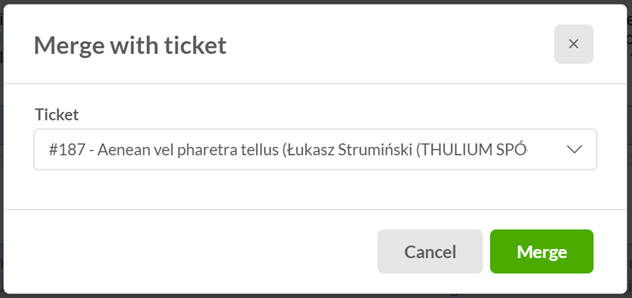
After selecting the ticket to be attached to the current one, click  , the system will display the information within the comment:

The client can get ticket merge information (you can configure this in tickets parameters.
The Print all function allows you to select individual messages/comments for printing. After selecting it, a window like this will appear:
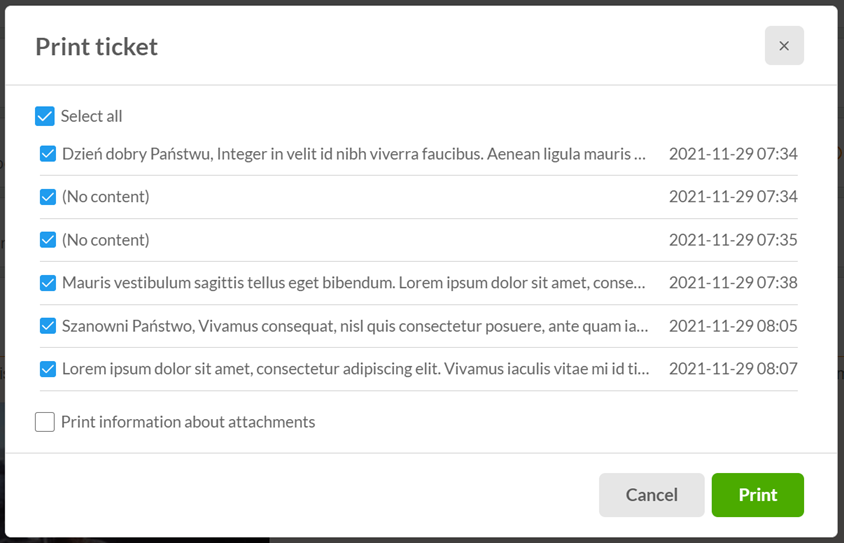
In addition, it is possible to check to show the presence of attachments in messages. By default, all messages are checked. Once selected, click  .
.
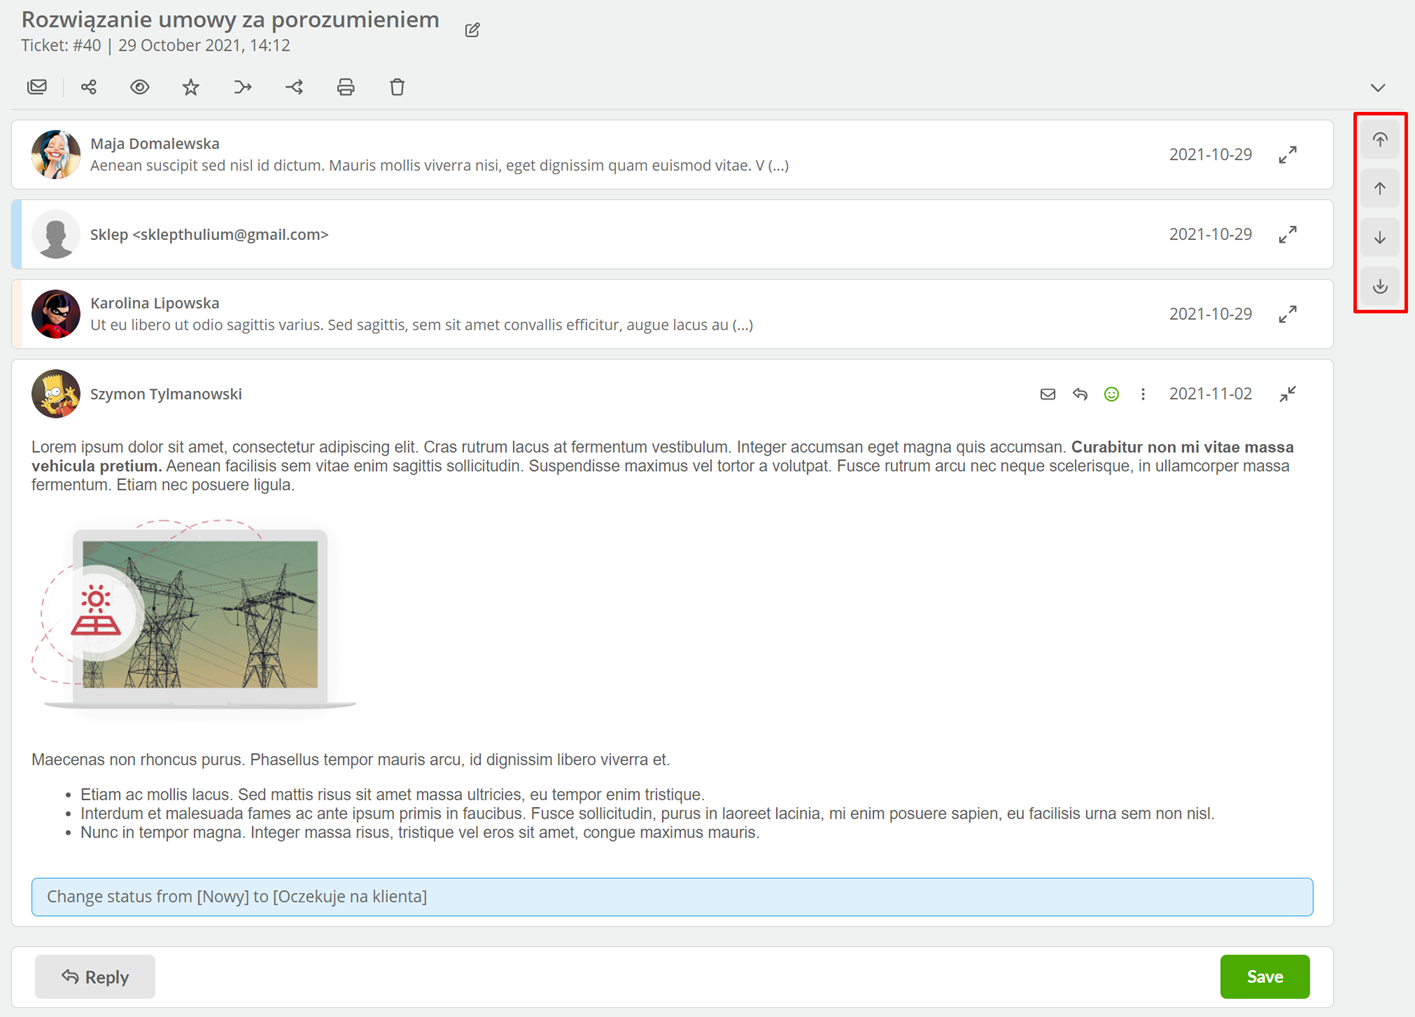
To expand all messages, click on  .
.
The navigator is designed to quickly move between events in a ticket including jumping to the first or last message:
Message details and other features
Show message details, which is available by clicking  within a message, will allow you to display such infromation as:
- from which e-mail account the message was downloaded,
- to which e-mail address it was sent,
- date of sending the message,
- date downloaded into the system after hovering the cursor over the
 ,
, - message content.
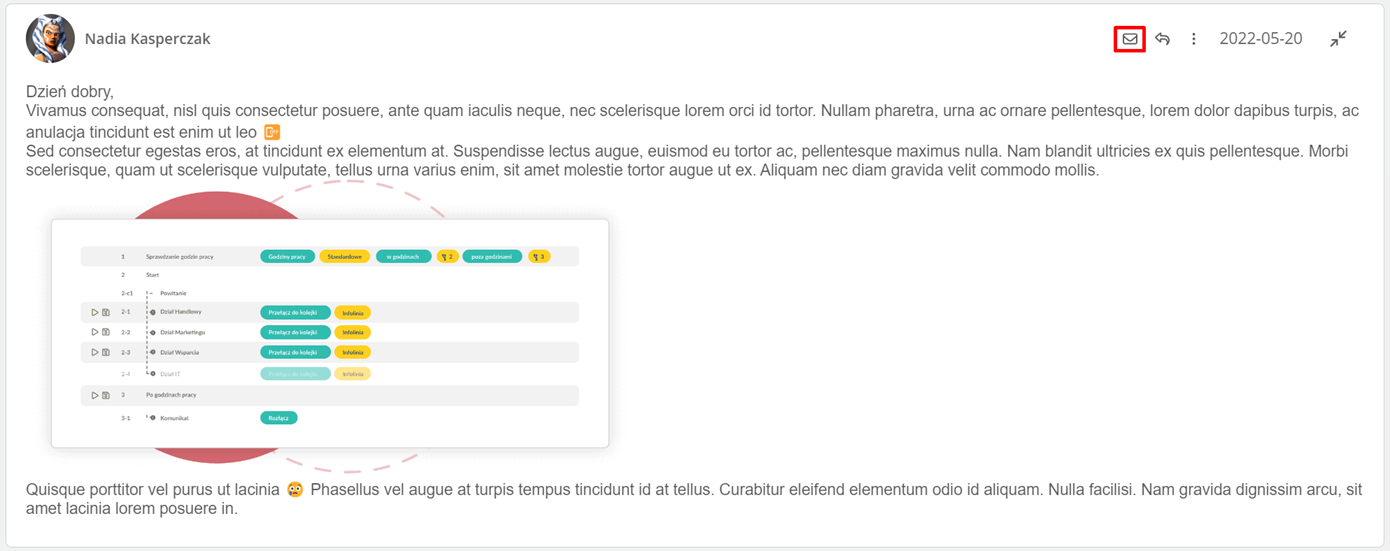
In addition, it is possible to download the source of such news by clicking  .
.
If a message is scheduled to be sent here, we will also have the option to cancel it or verify when it is sent:

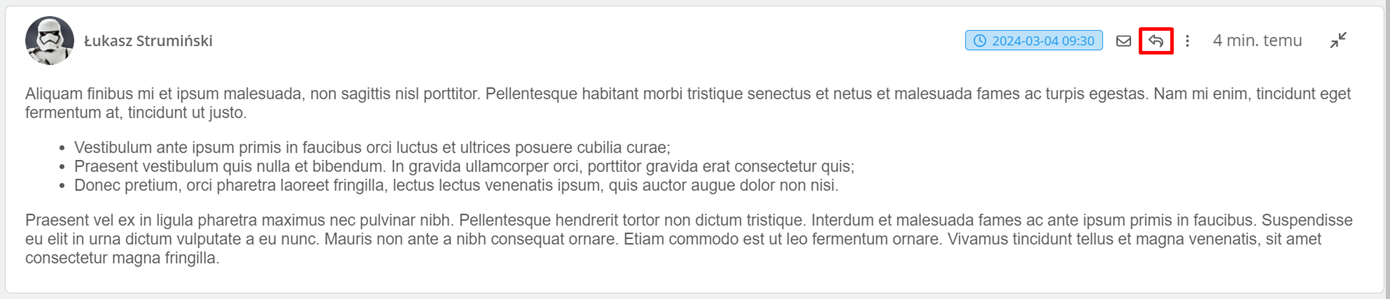
The Reply  function allows you to quote the message within which it was applied - the content will appear in the text editor.
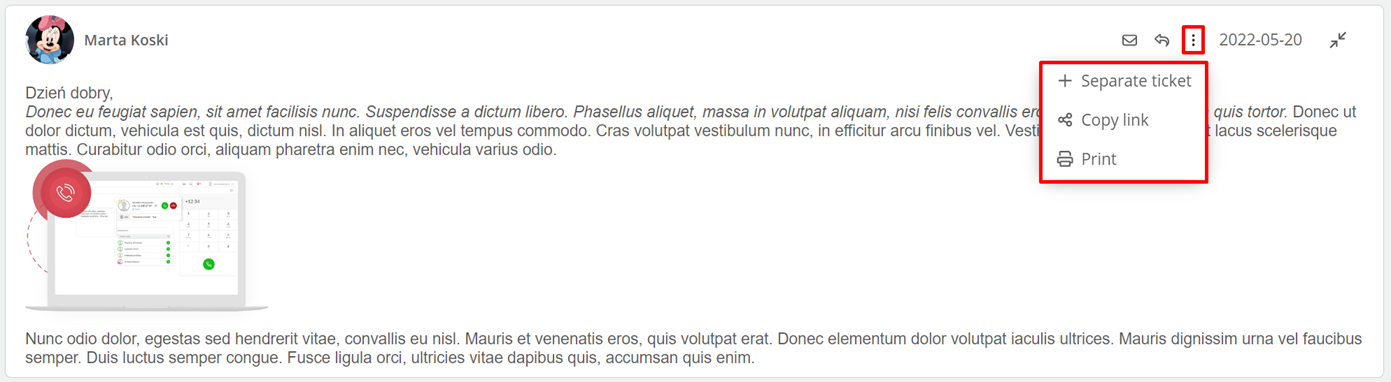
When you click on  , you will get access to features such as:
- Separate ticket,
- Copy link,
- Print.
Separate ticket will create a new ticket containing the contents of the message for which we called this function.
Information about the ticket separation will appear as a system comment in the ticket.

Selecting Copy link will copy such a link to the clipboard, so that when another person views such a link, the focus will be on the message in question.
To print a specific message, simply select Print.
Message, commentary and system commentary
As part of the course of correspondence, we will have such events as:
- Incoming/outgoing message
a) retracted

b) unfolded
- Sending error
a) retracted

b) unfolded

- Comment
a) retracted

b) unfolded
In the case of comments, it is possible to pin them to the main ticket screen:


By clicking on  we can find the given pinned comment in the list of events in the ticket.
- System commentary
a) retracted

b) unfolded

System comments may also be included as part of a message or comment.
In the case of a retracted message or comment, we can also receive information about:
- Customer rating of messages

- Pinned phone call

- Pinned chat conversation

- Attachment


Share your opinion with us