List of tickets
Tickets is an advanced tool that allows you to handle customer messages. You always know who is handling a particular ticket and the stage of completion. Thanks to the fact that each ticket has its own number you can find it in the system in seconds.
If you want to manage messages from customers, enter the Tickets tab - a list of messages will appear on the screen. The agent sees only messages from the queues to which it is assigned.
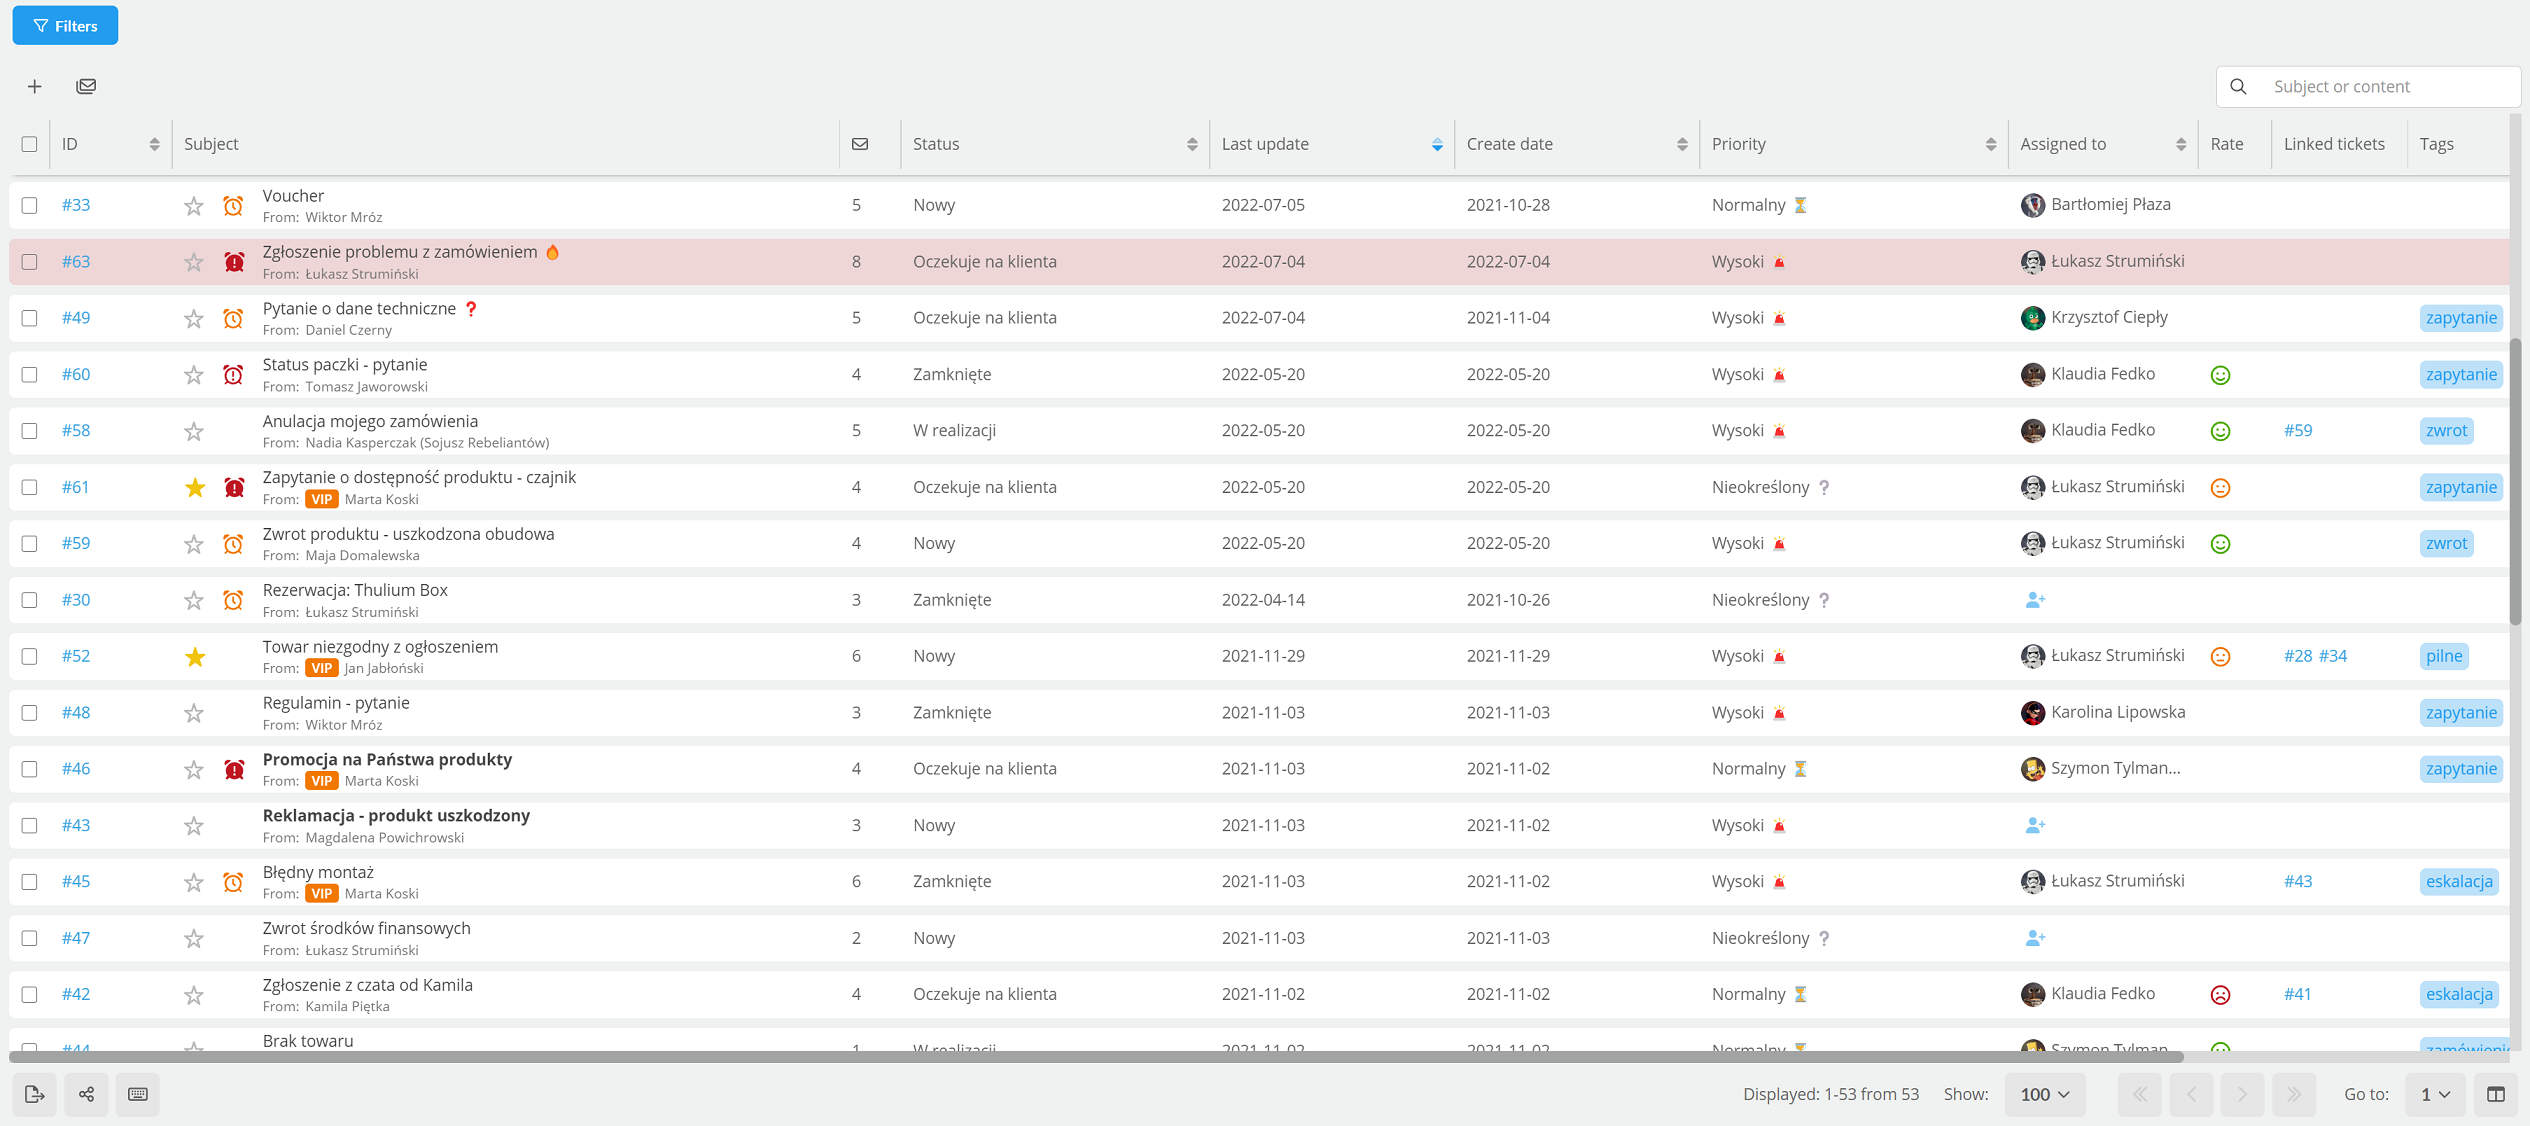
Each ticket is described by the following default columns:
- ID - unique ticket ID number,
- Subject - the subject of the message, and the customer's email address or data from the CRM,
 - number of interactions within the ticket,
- Status - status which shows you at what stage the ticket is in,
- Last update - shows the date of change (status change, response to a message),
- Create date- shows the date the ticket was created in the Thulium system,
- Priority - message validity shows you whether ticktets are completed within certain times. Exceeding particular response times is indicated by colored alarm clocks,
- Assigned to - user who deals with the request (the symbol
 means no assignment, if you click on it, you can select the user in question).
By expanding  you can describe messages with additional columns:
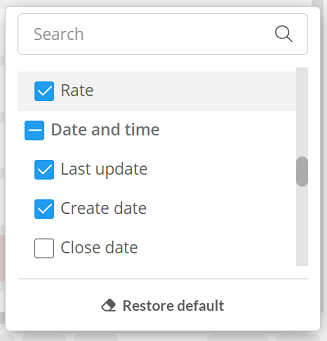
Columns can be expanded by clicking left mouse button on an edge and moving the cursor.

To change the order of fields, click on such a field and then move left/right.
By hovering over the subject of a message you have the option to preview it.
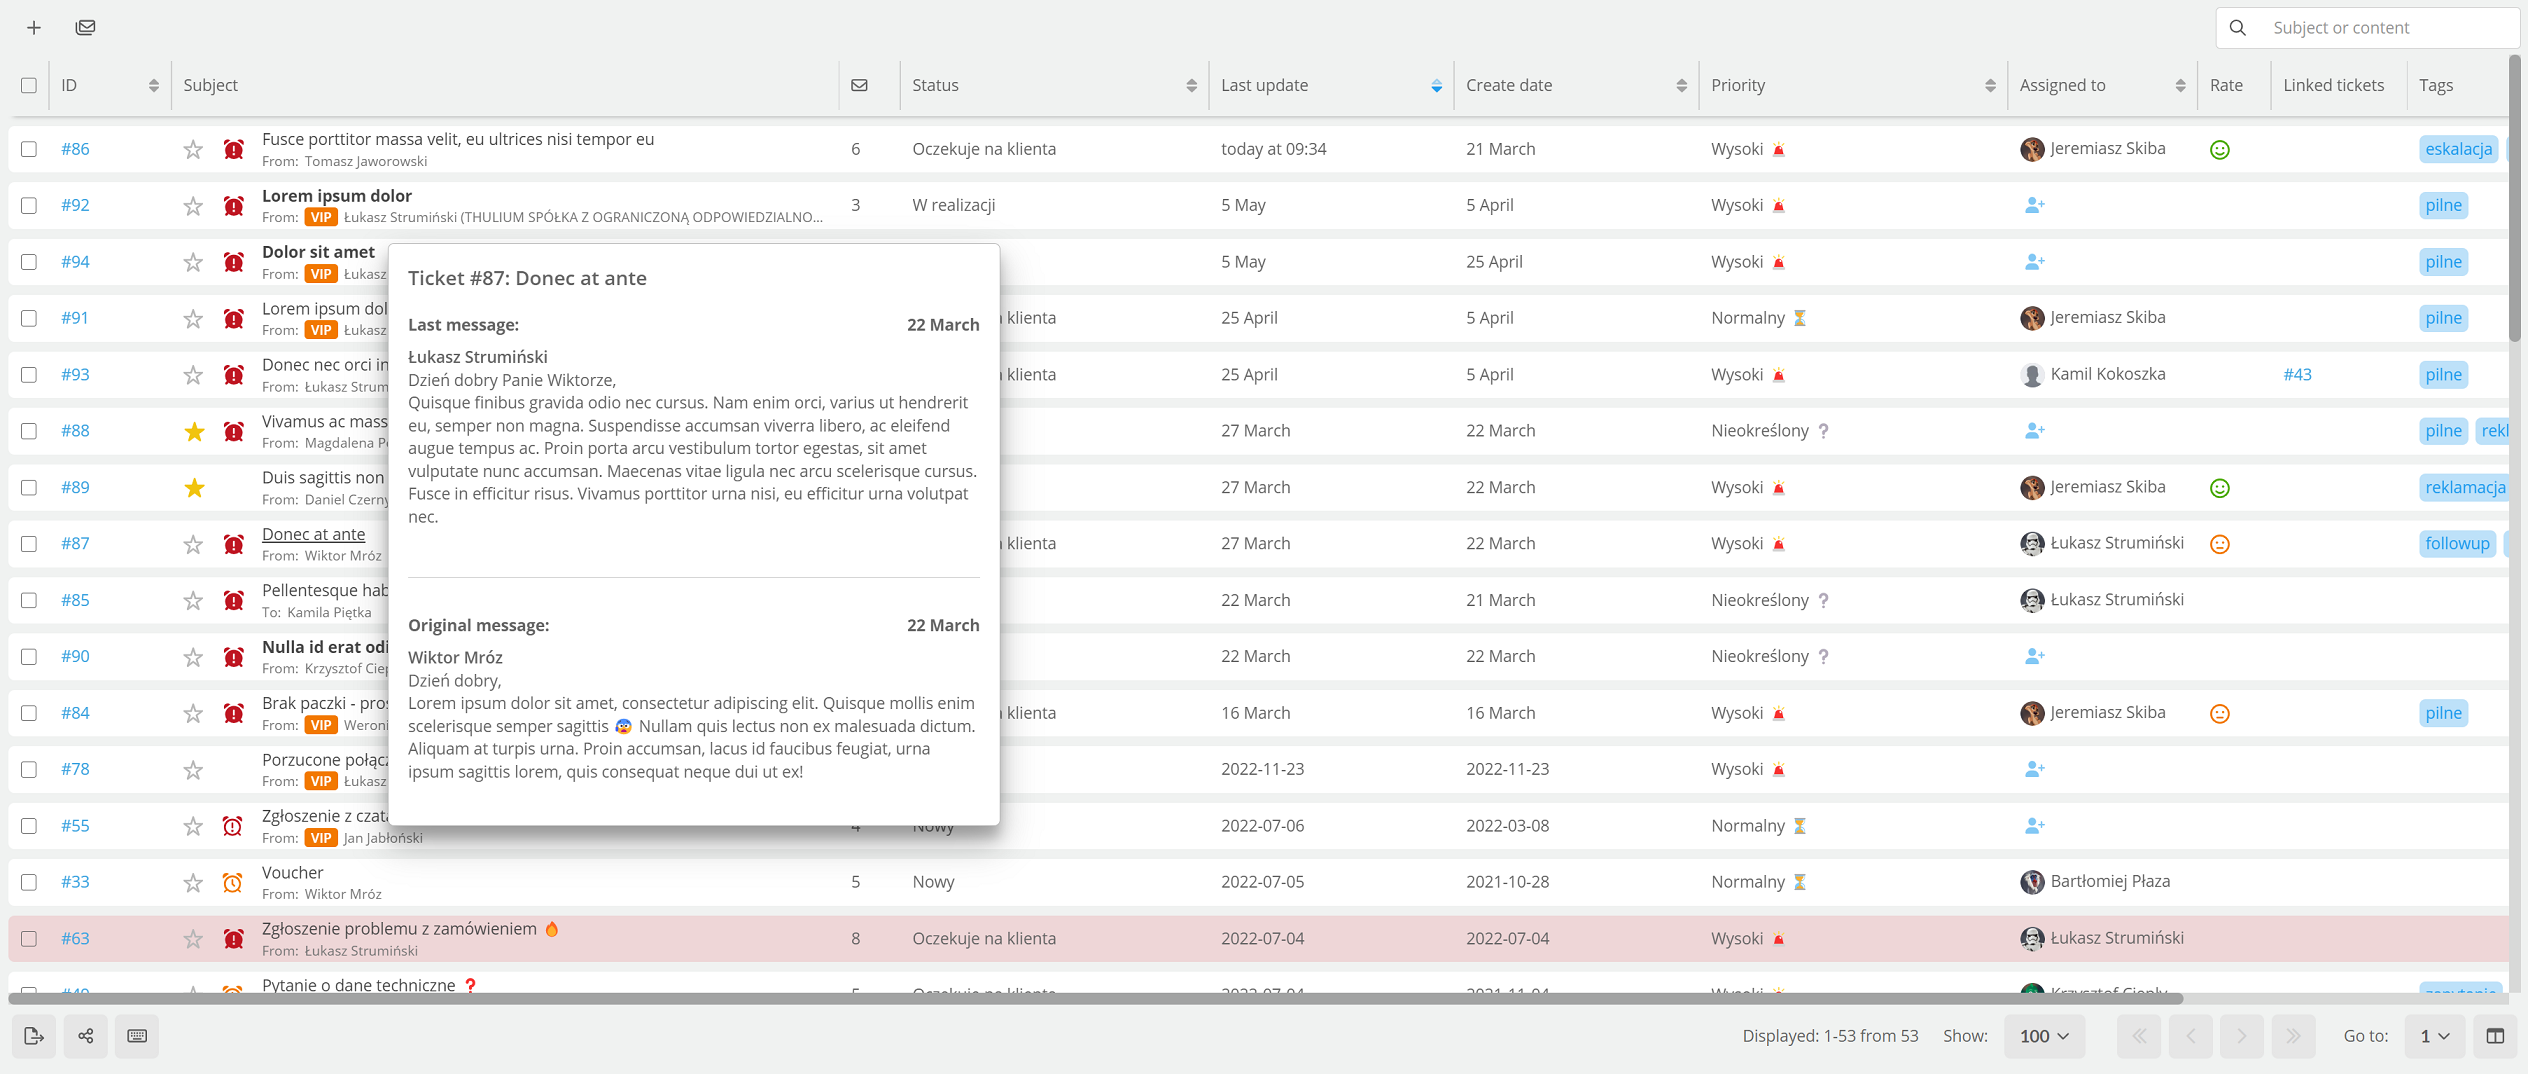
Our tickets allow you to track the sending of e-mails - in case a message for some reason has not been sent (e.g. wrong e-mail address) on the list of tickets will highlight in pink.

Filtering messages
You can search for messages using extensive filters.
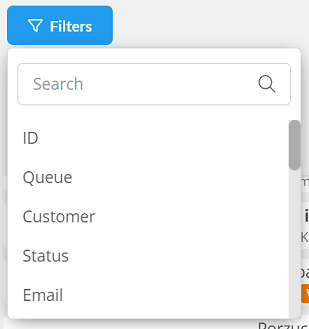
- ID - unique number to recognize the ticket in the system,
- Queue - queue to which the messages are assigned,
- Customer - ticket from a specific customer (customer or company),
- Status - ticket status,
- Email - tickets from a specific email address,
- Create date - date when the ticket was created,
- Update date - date of last modification,
- Content - content of the ticket,
- Subject - ticket subject,
- Assigned user - tickets assigned to the selected user,
- Priority - ticket with a given priority,
- Category - ticket with the category,
- Source - ticket source (Phone, Email, SMS, Chat, WWW...),
- Alert - displaying messages in which: Response time exceeded, Alarm time exceeded, or Due time exceeded,
- Observed - tickets observed by us,
- Marked with a star - tickets for which clicked
 ,
, - Tags - tagged tickets,
- First response time - time interval from - to in minutes for the first response,
- Close time - time interval from - to in minutes for closing a request from the moment it is registered in the system,
- With user message - tickets in which the message was sent by the agent.
After selecting the filters, the selected tickets will automatically appear in the list of tickets.

Clicking on  will remove all the selected filters - that is, it will lead to a situation of showing all the tickets we have access to.
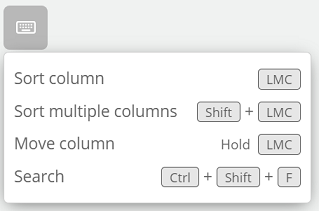
In addition, it is possible to search for tickets by subject or content by using the  search engine and entering and confirming with enter a keyword. By clicking Ctrl + Shift + f you can quickly call up the search engine and enter the keyword.

Did you know...💡
The list of tickets is automatically refreshed with new tickets taking into account the selected filters. The system checks every 15 seconds whether there are new tickets that meet the search criteria. This process will not take place if you call the context menu on the ticket or mark the tickets with the  checkbox.
If you often use a certain type of filters you can save this setting. The next time you want to search for tickets in the same way, all you have to do is choose a scheme. How will you do it? After selecting the filters, click on the filter slider  , and then select
  .
.
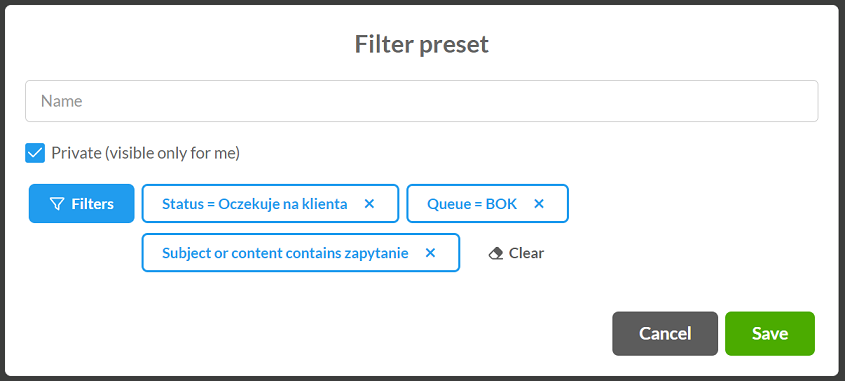
In the window, enter the name of the filter and decide whether it will be visible to all or private. At this stage it is still possible to modify the saved set of filters. After selecting them, confirm your choice by clicking  .
.
The created filter will appear under the slider with the division into Public and Private Filters.

By default, the Thulium system adds filters such as:
- Bieżące - current open tickets (without Zamknięte and Połączone or Odłożone status),
- Tylko moje i nieprzypisane - tickets assigned to a user and messages that do not have an assigned person,
- Nowe - tickets with status Nowy,
- Odłożone - tickets that have been postponed (status Odłożone),
- Oznaczone gwiazdką - tickets for which clicked
 .
.
To edit existing filters, click on the  symbol, and then click:
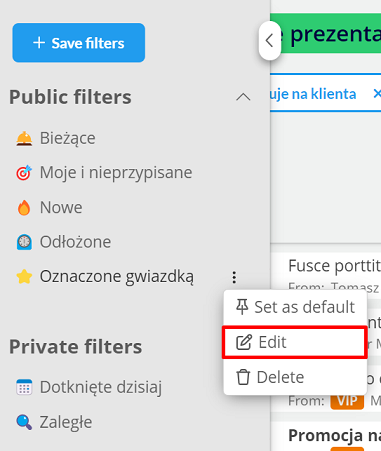
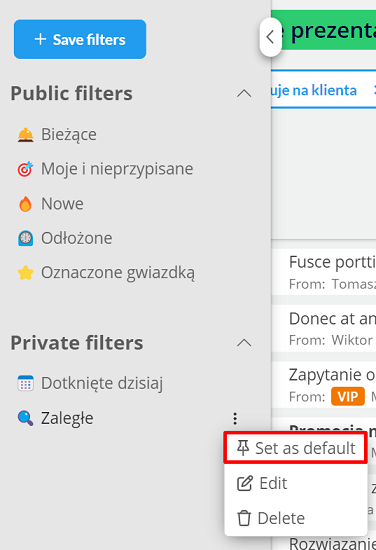
A predefined set of public/private filters can be set as the default:
It is possible to change the following parameters in bulk for selected tickets from the list:

- Change assignment
 - change the assigned user for selected tickets,
 - Change status
 - change of status for designated tickets,
 - Change category
 - change of category for selected tickets,
 - Change priority
 - change in priority of tickets,
 - Change queue
 - changing the queue for flagged tickets,
 - Add tags
 - adding tags for designated tickets,
 - Mark as read
 - marking designated tickets as read,
 - Mark as unread
 - marking selected tickets as unread,
 - Remove tickets
 - removal of the indicated tickets from the system.
It is also possible to make a change on a single ticket by invoking the context menu (right-click on the ticket field).

Dostępne są takie funkcjonalności jak:
- Open
 - opening the indicated ticket in the same browser tab,
 - Open in new tab
 - opening the indicated ticket in a new browser tab,
 - Assign me
 - assigning us to the selected ticket,
 - Observe
 - observing the marked ticket,
 - Stop watching
 - stop observing for the selected ticket,
 - Mark as read
 - marking the selected ticket as read,
 - Mark as unread
 - marking the indicated ticket as unread,
 - Mark with star
 - marking the selected ticket with an star,
 - Remove star marking
 - removal of star for the indicated ticket,
 - Remove
 - removal of the selected ticket from the system.
To export the list of tickets including selected filters to csv/xlsx, click  .
.
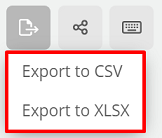
To forward a link to a given list of tickets including selected filters to another user, click on  .
.
You can display the function keys for the list of tickets by clicking on  .
.
Sorting tickets
The tickets are sorted by default by the date of change, i.e. from newest to oldest. By clicking on another column with the left mouse button, we can set sorting on it from, for example, highest to lowest values, etc. If you need to sort by more than one column, press the Shift key and click the left mouse button on the column.

Serving and adding requests
To serve another ticket, select the  button, adding a ticket is possible by clicking
  .
.

Share your opinion with us