User permissions

Author: Łukasz Strumiński
Created: 2022-12-30. Updated: 2022-12-30.
Permissions determine access to specific tabs and modules of the system. Agents most often have limited visibility of the panel - they can't see administrative parts and most reports, but only those modules related to calls, requests and chats. As an administrator, you have permissions to all parts of the system and can grant them to other users.
Did you know...🔎
If you want, for example, all agents to have the same permissions instead of granting them individually to each of them - use roles, which allow group granting of permissions.
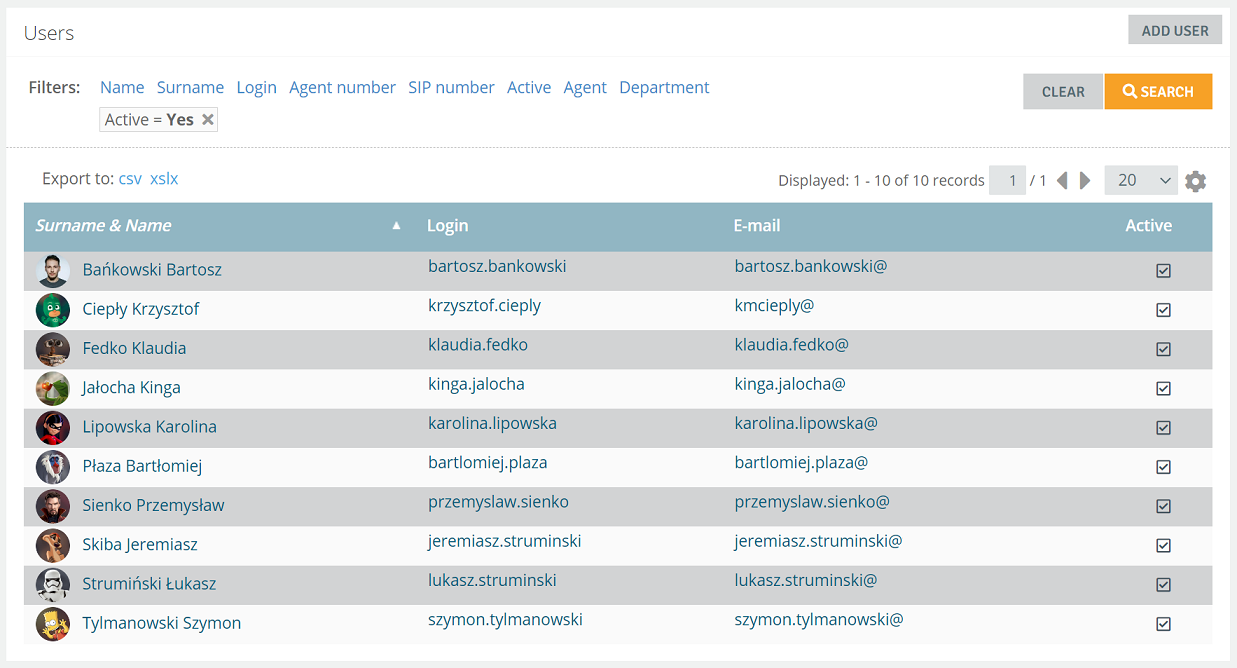
From the Administration tab, select Users → Users.

A list of users will appear on the screen - enter one of them.
On user tab in the System data section, click  .
.
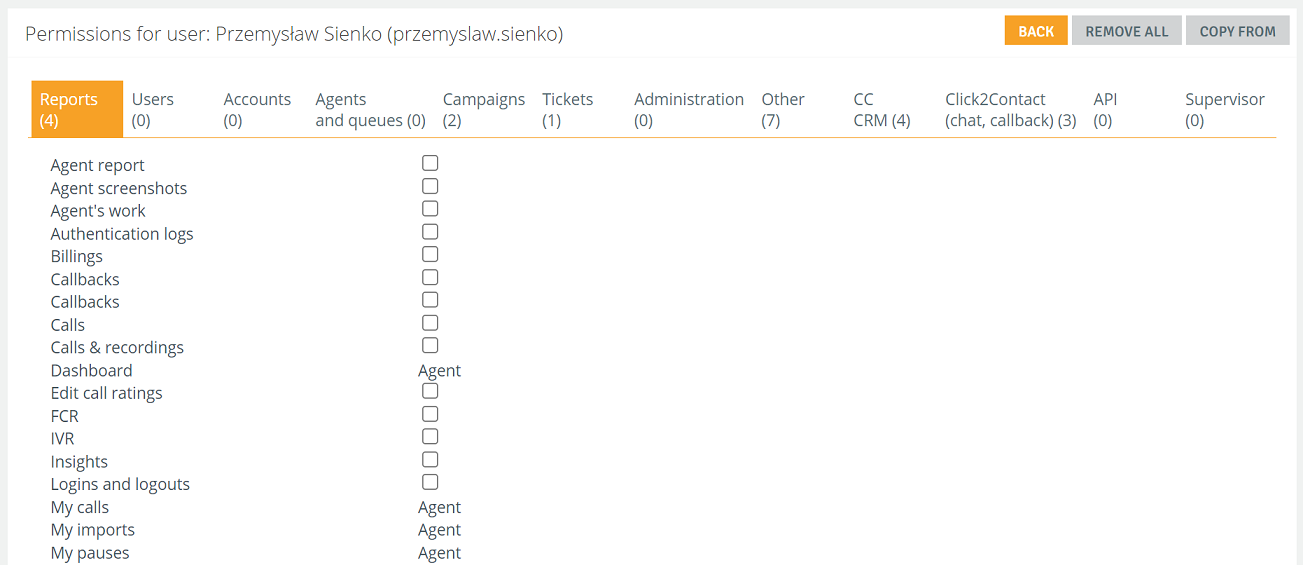
Permissions are divided into 10 categories taking into account the various functions of the system. In parentheses next to each category, the number of granted permissions from the category is shown, e.g. Administration (2) means that from this part the user has access to 2 permissions.
Next to each authorization in parentheses is the name of the module to which the authorization belongs e.g. My records (Campaigns) means that this report applies to campaigns.
- Reports - list of reports,
- Users - create and edit users, create and assign roles,
- Accounts - management of SIP accounts and service provider, creation and editing of call forwarding,
- Agents and queues - management of, among other things, hours of operation, call topics and infoline queues,
- Campaigns - management of blacklists, campaigns and system statuses, among others,
- Tickets - management of, among other things, statuses, categories and priorities of tickets and mailbox configuration,
- Administration - administrative parameters including access to on-call, IVR tree and system parameters,
- Other - additional functions enabling, among other things, listening to recordings and assigning notifications,
- CC CRM - ability to, among other things, add and edit special fields and create customer groups,
- Click2Contact - possibility of, among other things, conducting chats and widgets,
- API - access to Webhooks,
- Supervisor - actions related to actions on agents' statuses.
By checking and unchecking the checkboxes next to the permissions in each group, you specify what the user will see and have access to.
The settings are saved automatically - once checked, just click the  button.
When you click the 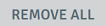 button, all checked permissions will be deleted.
Important...⚠️
If a user is assigned a specific role, e.g. Agent, then next to the permissions specified in this role, there will be a role name instead of checkboxes - in this case Agent.
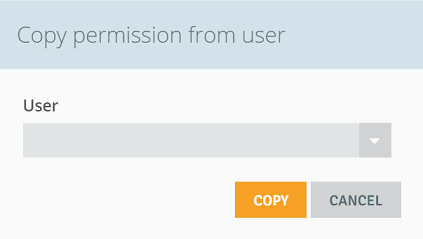
By clicking the 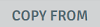 button, you can copy permissions from another user.

Share your opinion with us